Tuesday, April 16, 2013

Double Dark Chocolate Mocha Cake

Last week, I was asked to make a cake for a farewell sort-of party. The retiring person was a big fan of any and all kinds of cake, so I was given the freedom to choose whatever I wanted to make. I was thrilled! :) I decided to bake a dark chocolate mocha cake (which is one of my personal favorite cakes) but for the filling and the frosting I wanted to try something new and different. So, I chose a chocolate cream cheese frosting for the filling and the base layer of frosting and a mocha frosting for the basket weave and the decorations on top. It worked out pretty successfully with the two shades of brown in the two frostings and the flavor combination was to die for! The lady who took it to the party said that there wasn't a single crumb left and that the cake was "amazing". That's what I like to hear! :) So, I am sharing the recipe with you, as it received such rave reviews.


Dark Chocolate Mocha Cake

  • 1 3/4 cups all-purpose flour
  • 1 3/4 cups sugar
  • 3/4 cup cocoa powder
  • 2 tsps baking soda
  • 1 tsp baking powder
  • 1/2 tsp kosher salt
  • 1 cup buttermilk, shaken
  • 1/2 cup vegetable oil
  • 2 eggs, room temperature
  • 1 tsp vanilla extract
  • 1 cup hot coffee

    Directions:
    Preheat the oven to 350 degrees F. Prepare two 8-inch round cake pans – Line with parchment, then butter and flour the pans (or use “PAM for Baking”).

    1. Sift the flour, sugar, cocoa, baking soda, baking powder, and salt into the bowl of an electric mixer fitted with a paddle attachment and mix on low speed until combined.
    2. In another bowl or large measuring cup, combine the buttermilk, oil, eggs, and vanilla. Gently whisk.
    3. With the mixer on low speed, slowly add the wet ingredients to the dry. With mixer on the lowest setting, add the coffee and stir just to combine – scrape up from the bottom to make sure all the flour is incorporated. Batter will be very thin and runny- don't worry!
    4. Pour the batter into the prepared pans and bake for 30-35 minutes or until a toothpick inserted in the center comes out clean. Cool in the pans for 10 minutes, then turn them out onto a cooling rack to complete cooling.

Chocolate Cream Cheese Frosting/Filling
  • 1/2 cup unsalted butter, softened
  • 4 oz cream cheese, softened
  • 4 cup powdered sugar
  • 1/4 cup unsweetened cocoa powder
  • 1 Tbsp chocolate syrup
  • 1-2 Tbsp milk

    Directions:
    Beat butter and cream cheese for 3-5 minutes, until fluffy. Bean in powdered sugar, cocoa powder, chocolate syrup and 1 Tbsp milk. Beat for an additional 3-5 minutes, adding more milk to get desired consistency.
    I used this frosting to fill the cake with and to do the crumb coating on the sides and cover the top.

Mocha Frosting
  • 1 tbsp instant coffee powder
  • 2 tbsp boiling water
  • 3-oz unsweetened or dark chocolate (I used Ghirardelli's bittersweet), chopped
  • 3/4 cup butter, room temperature
  • 1 tsp vanilla extract
  • 3 cups confectioners’ sugar

Directions: 
In a medium sized, microwave-safe bowl, combine instant coffee and boiling water. Stir to completely dissolve coffee. Add chocolate to the bowl and allow the hot water to begin to melt the chocolate, stirring occasionally. If the chocolate does not melt, microwave mixture in 20-30 second intervals until chocolate is melted. Set aside to cool completely.
In a large bowl, beat butter until fluffy and creamy. Beat in vanilla extract and cooled chocolate mixture. Gradually blend in the confectioners’ sugar and beat until frosting is thick and fluffy.
I used this frosting to pipe the basket weave on the sides and to make the roses for the top of the cake.


Recipes adapted from:
Dark Chocolate Mocha Cake: click here.
Chocolate Cream Cheese Frosting: click here.
Mocha Frosting: click here.

Tuesday, April 2, 2013

Key Lime Cupcakes


These cupcakes were inspired by Trisha Yearwood's recipe for Key Lime Cake. I first saw it on Pinterest and was intrigued by it right away since I love all citrus-flavored desserts. After reading the numerous contradicting reviews (many people raving about it and just as many complaining that it's awful), I decided I must give it a try. I did take into account some of the major complaints about this cake though and so, ended up changing it a bit, to avoid any disappointments on my part. I was very happy I did! The original recipe called for 1 1/2 cups of oil in the cake which most people stated was way too much. I cut the amount of oil to only 1 cup and the cake turned out moist but not greasy. Some other complaints were that it didn't have a strong lime flavor. I added more lime juice and more lime zest to both the batter and the frosting and my cupcakes were wonderfully flavorful with a nice punch of lime to them. Everybody who tried them commented that they were "unique" and "lovely". I was extremely pleased with the final outcome. Please, let me know what you think if you decide to give them a try yourself!


Cake:
■1 3-oz package lime-flavored gelatin
■1⅓ cups granulated sugar
■2 cups sifted all-purpose flour
■½ tsp salt
■1 tsp baking powder
■1 tsp baking soda
■5 large eggs, slightly beaten
■1 cup vegetable oil (the original recipe wanted 1 1/2 cups but I cut this to just 1 cup)
■¾ cup orange juice (I used 1/2 cup orange juice)
■3-4 tbsp Key lime juice and the zest of about 2-3 limes
■½ tsp vanilla extract (or lemon extract to give extra citrus flavor)

Preheat the oven to 350°F. Line muffin pans with cupcake liners- I ended up making 24 regular size cupcakes and 20 mini cupcakes out of this recipe.

In a large mixing bowl, mix the gelatin, sugar, flour, salt, baking powder, and baking soda. Stir to mix well. Add the eggs, oil, orange juice, lime juice, and vanilla (or lemon extract). Using an ice-cream scoop, scoop batter into muffin pans and bake in preheated oven for 18-20 minutes for regular size cupcakes and about 14 minutes for minis. Test for doneness by lightly touching the tops of the cupcakes or inserting a toothpick. Cool in the pans for 5 minutes, then take them out onto racks.


Glaze
■½ cup Key lime juice (from about 25 small Key limes or 4 large regular limes)
■½ cup confectioners’ sugar

While the cupcakes are still hot, mix the lime juice and confectioners’ sugar and brush it over the tops (I went over each cupcake about 3-4 times). You can pierce the cupcakes with a fork first to allow the glaze to soak in better. Allow the cupcakes to cool completely as you prepare the cream cheese icing.


Cream Cheese Icing:

■½ cup (1 stick) butter, room temperature
■1 (8-oz) package cream cheese, room temperature
■1 (1-lb) box confectioners’ sugar
lime zest and lime juice (optional)


Cream the butter and cream cheese. Beat in the confectioners’ sugar until the mixture is smooth and easy to spread. Add lime zest and lime juice (if using). Pipe icing on cupcakes (I added jelly beans on mine as well, since I made them for Easter :)). 


To see the original recipe (which I modified), click here.

Sunday, March 31, 2013

Happy Easter!

Happy Easter everyone! He is risen!

The kids and I worked on our Easter egg coloring yesterday and we all had lots of fun! The eggs came out so colorful! Here they are, drying out: 

My treasures, posing with the finished "product" :)

Proud with their work:)

Our Easter centerpiece this year (we started cat grass a week ago and it was ready just in time- so exciting- and springy!):

Sunday, March 24, 2013

Chocolate Trifle with Homemade Pudding

For my Mom's Birthday party a few weeks ago I also made this chocolate trifle that I forgot to blog about. :) All chocolate lovers raved about it. It was a snap to put together. The only more time-consuming element was the homemade chocolate pudding but it so silky and delicious, it was definitely worth the few extra minutes. I made a batch of brownies and since I was pressed for time- (i.e. made this at 11:30PM) I simply used a box mix. I then layered brownies, chocolate pudding, and Cool Whip, repeating the layers a couple of more times and finishing of with chocolate syrup that I swirled around with a knife for a fancier presentation. It was almost completely gone by the end of the party! :)
 

Chocolate Pudding:
Ingredients:
  • 1/2 cup white sugar 
  • 3 tablespoons unsweetened cocoa powder 
  • 1/4 cup cornstarch 
  • 1/8 teaspoon salt 
  • 2 3/4 cups milk 
  • 2 tablespoons butter 
  • 1 teaspoon vanilla extract 
Directions:
  1. In a saucepan, stir together sugar, cocoa, cornstarch and salt. Place over medium heat, and stir in milk. Bring to a boil, and cook, stirring constantly, until mixture thickens enough to coat the back of a metal spoon. Remove from heat, and stir in butter and vanilla. Let cool briefly, and serve warm, or chill in refrigerator until serving.

This is a link to the original recipe for the chocolate pudding:
http://allrecipes.com/recipe/chocolate-cornstarch-pudding/

Saturday, March 23, 2013

White Texas Sheet Cake

This was a cake I made a couple of times last week. I had seen it on Pinterest and thought it sounded delicious- anything vanilla sounds great to me! :) Of course, I had to add a little bit of my own to the recipe: I couldn't resist throwing in some lemon zest, as I had fresh lemons and I love the flavor they add to vanilla desserts. It was extremely easy to prepare and it turned out very yummy! I had some excellent reviews!

Ingredients:

Cake:
1 c. butter
1 c. water
2 c. sugar
2 c. + 4 T flour
1/2 t salt
1 t soda
2 eggs
1 t vanilla
zest of 1 lemon (optional)
1/2 c. sour cream

Frosting:
1 C butter
6 T evaporated milk
1 t vanilla
4-5 c. powdered sugar
dash of salt
1 c. pecans, chopped (optional)


Directions:
Put butter and water in a large bowl.  Heat in microwave for 2 minutes.  Stir until all the butter is melted.  Add sugar, flour, salt, and soda.  Stir with a wire whisk until smooth.  Add eggs, vanilla and lemon zest. Beat well.  Stir in sour cream until all is blended. 
Pour into a 11”x17” baking sheet that has been greased and floured. 
Bake at 375º for 20-25 minutes, until cake springs back when lightly touched or toothpick inserted in center comes clean.
Remove from the oven and make the frosting.
Cook butter and milk for 3-4 minutes in microwave.  Add powdered sugar, vanilla, and a dash of salt.  Beat until smooth. Add nuts and gently spread on warm cake.


Cool and serve.

This awesome recipe came from:
http://www.friedalovesbread.com/2011/12/quick-easy-dessert-for-group-white.html

Friday, March 22, 2013

Spring cupcakes

Anna and I worked on some spring cupcakes last night, for my son's spring party at school. We had lots of fun! Anna did quite a lot of decorating. I am so proud of her! She did a great job!

We started with these vanilla cupcakes to which I just added 1/3 cup of sprinkles to the batter:
(for recipe click here)
We then prepared our buttercream frosting in four colors:
(for recipe click here)
And after some piping and fun we transformed these:

into these:

Happy Spring! :)

Tuesday, March 19, 2013

Golden Rum Cake

I am generally a fan of "from scratch" baking, but this recipe that starts with a boxed cake mix has won me over. I have to admit, I was sceptical at the beginning, but after reading all the rave reviews it had on the website where I found it, I had to give it a try. Wow! I can honestly say this is one of the moistest cakes I have ever tasted- between the pudding mix and rum in the cake itself and the rum glaze you add to it after baking it is simply phenomenal! And- always a bonus for me- easy, easy! It does have a little "kick" to it, so if you want to avoid that, just add the rum to the glaze a couple of minutes earlier to let the alcohol cook out. The flavor will still be there! This is great on its own, but I think it will be out of this world with a little vanilla ice cream on the side... :)))

Ingredients:
Cake:
1 cup chopped walnuts or pecans
1 (18.25 ounce) package yellow cake mix
1 (3.4 oz) package instant vanilla pudding mix
4 eggs
1/2 cup water (or milk)
1/2 cup vegetable oil
1/2 cup dark rum (I used Bacardi)

GLAZE:
1/2 cup butter
1/4 cup water
1 cup white sugar
  1/2 cup dark rum (I used Bacardi)


Directions:
1. Preheat oven to 325 degrees F (165 degrees C). Grease and flour a 10 inch Bundt pan. Sprinkle chopped nuts evenly over the bottom of the pan.
2. In a large bowl, combine cake mix and pudding mix. Mix in the eggs, 1/2 cup water, oil and 1/2 cup rum. Blend well. Pour batter over chopped nuts in the pan.
3. Bake in the preheated oven for 60 minutes, or until a toothpick inserted into the cake comes out clean. Let sit for 10 minutes in the pan. After the cake cools in the pan for about ten minutes, take a spatula and loosen it from the sides and from the center (bundt pan). Poke holes in cake using a fork or a skewer. Then, pour the hot glaze around the edges so it goes right down the sides and soaks into the bottom (which will be the top) and the sides of the cake. Also, pour some around the inner ring and then a little along the top (which will be the bottom).  Let it sit for an hour or two, upside down, and then flip it over onto a serving plate and let it sit for a few hours or overnight before serving. It is definitely better the day after.
4. To make the glaze: in a saucepan, combine butter, 1/4 cup water and 1 cup sugar. Bring to a boil over medium heat and continue to boil for 5 minutes, stirring constantly. Remove from heat and stir in 1/2 cup rum.
Recipe courtesy:

Friday, March 15, 2013

Irish Soda Bread

I had been meaning to make Irish Soda Bread for this St. Patrick's Day and was looking for a good recipe to try out. Ina Garten was this year's inspiration. I love Ina. I love her recipes. I own most of her cookbooks. This recipe did not disappoint. It was exactly the kind of Irish Soda Bread I like. And while it may not be the traditional ISB, it certainly meets all my requirements for being a delicious loaf: slightly sweet, slightly crumbly, with raisins, nice flavor and definitely no caraway seeds. It turned out just the way I was hoping, and beautiful too! :)


Ingredients
4 cups all-purpose flour, plus 1 tbsp extra for currants
1/4 cup sugar
1 teaspoon baking soda
1 1/2 teaspoons kosher salt
4 tablespoons (1/2 stick) cold unsalted butter, cut into 1/2-inch dice
1 3/4 cups cold buttermilk, shaken
1 extra-large egg, lightly beaten
1 teaspoon grated orange zest
1 cup dried currants (I used raisins since I didn't have currants)

Directions
Preheat the oven to 375 degrees F. Line a sheet pan with parchment paper.

Combine the flour, sugar, baking soda, and salt in the bowl of an electric mixer fitted with the paddle attachment. Add the butter and mix on low speed until the butter is mixed into the flour.

With a fork, lightly beat the buttermilk, egg, and orange zest together in a measuring cup. With the mixer on low speed, slowly add the buttermilk mixture to the flour mixture. Combine the currants with 1 tablespoon of flour and mix into the dough. It will be very wet.

Dump the dough onto a well-floured board and knead it a few times into a round loaf. Place the loaf on the prepared sheet pan and lightly cut an X into the top of the bread with a serrated knife. Bake for 45 to 60 minutes, or until a cake tester comes out clean. When you tap the loaf, it will have a hollow sound.

Cool on a baking rack. Serve warm or at room temperature.


Per slice (15): Calories: 205; Total Fat: 4 grams; Saturated Fat: 2 grams; Protein: 5 grams; Total carbohydrates: 37 grams; Sugar: 11 grams; Fiber: 2 grams; Cholesterol: 23 milligrams; Sodium: 312 milligrams

Recipe courtesy: http://www.foodnetwork.com/recipes/ina-garten/irish-soda-bread-recipe/index.html

Thursday, March 14, 2013

Green candied popcorn for St. Patrick's Day :)

This was another green-themed snack I made for my daughter's St. Patrick's Day party in school. It was funky looking and very yummy. :) Easy to make too.


Ingredients:
4 quarts popped corn
1 1/2 Cups sugar
1/2 Cup light corn syrup
2 Tablespoons butter
1/2 teaspoon salt
1/4 teaspoon cream of tartar (optional, does make mixture slightly more creamy)
1/4 teaspoon vanilla
1 teaspoon baking soda
green food coloring


Directions:
In heavy saucepan on medium heat melt butter then add sugar, corn syrup, cream of tartar and salt. Increase temperature to medium high and bring mixture to a boil, stirring constantly to dissolve sugar. Once mixture boils, add in food coloring and stop stirring. Boil for 5 minutes (Do not stir). Mixture should be about 250-260 degrees on a candy thermometer. Remove from heat and carefully stir in vanilla and baking soda. Working quickly and while mixture is foamy, pour mixture over popped corn and gently stir to coat popcorn. Place popcorn into a large roaster or rimmed baking sheet (lined with parchment paper or sprayed with cooking spray) and bake at 225° F for 15-20 minuted.

Special thanks for this yummy recipe to Skip to my lou

Wednesday, March 13, 2013

St. Patrick's Day cupcakes

It is St. Patrick's Day this weekend! As tradition would have it, I am again one of the class moms in charge of sending in goodies for my daughter's St. Patrick's Day party in school. :) Of course, I had to bake something special. So, here are the cupcakes I whipped up for this occasion... They turned out pretty yummy and very, umm.... green! :))

Rainbow cupcakes with green magical frosting topped with green chocolate covered pretzels

Rainbow cupcakes

Ingredients:
2 1/2 cups flour
1 teaspoon baking powder
1/2 teaspoon baking soda
1/2 teaspoon salt
3 large eggs
2 cups sugar
1 cup canola oil
2 teaspoons vanilla extract
1 cup sour cream
1/2 cup milk
1/3 cup rainbow colored sprinkles 
Directions:
Preheat oven to 350F. Line muffin tins with paper liners (for cupcakes).
In a medium-sized bowl, whisk together flour, baking powder, baking soda and salt.
In the bowl of your electric mixer, beat eggs and sugar until thick and creamy (about 2 minutes).
Blend vanilla, oil and sour cream.
Add flour and milk, alternating- starting and finishing with flour. 
Add the sprinkles and mix just to blend in.
Pour in muffin tins. Bake 18-19 minutes or until they test done.


Green Magical Frosting

Ingredients:
1 1/2 cups granulated sugar
1/4 cup all-purpose flour
3 tablespoons cornstarch
1/4 teaspoon salt
1 1/2 cups milk
2 teaspoons pure vanilla extract
24 tablespoons (3 sticks) butter, cut into 24 pieces and softened at room temperature
green food coloring (I use Wilton gel food coloring)
green sugar for decorating (optional)


Directions:
In a medium bowl, combine the sugar, flour, cornstarch and salt. Slowly whisk in the milk until the mixture is smooth. Place a fine-mesh strainer over a medium saucepan and pour the milk mixture through the strainer into the saucepan. Cook the mixture over medium heat, whisking constantly, until the mixture boils and is thick enough that it starts to become difficult to easily whisk. This could take anywhere between 5-10 minutes, for me it was ready in exactly 7 minutes. It should bubble quite a bit at the end (be careful of the splatters) and thicken considerably.

Transfer the mixture to the bowl of your stand mixer and cool to room temperature – this is extremely important! If it is even slightly warm, the frosting won’t beat up properly. (It took my mixture a good 2 hours to come to room temperature and it was smooth sailing from there.) You can also refrigerate the mixture overnight. If you do this, make sure to pull it out in time to let it warm back up to room temperature. If you try to proceed with the rest of the recipe and the mixture is too cold, the butter won’t absorb into the frosting properly.

Once the frosting is completely cooled to room temperature (it should have no hint of warmth at all!), pop the bowl on your stand mixer and beat the mixture with the vanilla on low speed until it is well combined, about 30 seconds. Add the butter, one piece at a time, and beat the frosting until all the butter has been incorporated fully, about 2 minutes. Increase the speed to medium-high and let the mixer work its magic. Beat the frosting for five minutes, until it is light and fluffy. Add green food coloring and blend until the color is distributed evenly. Let the frosting sit at room temperature until it is a bit more stiff, about 1 hour, or chill if you want a stiffer consistency for piping. I piped mine without chilling it and it was stiff enough.


Green Chocolate Covered Pretzels

Ingredients:
30 or more pretzels
1 bag (12 oz) of dark green candy melts (I use Wilton)
sprinkles or decorative sugar (optional)

Directions: 
1. Prepare a baking sheet by lining it with aluminum foil.
2. Put candy melts in a large microwave-safe bowl and microwave until melted, stirring after every 30 seconds.Take it out of the microwave when there are still unmelted chips remaining, and stir until the final chips melt.
3. Drop each pretzel in the melted candy melts and submerge it slightly. Use a fork to pull the pretzel out. Shake the chocolate-dipped pretzel several times to remove excess chocolate, and place it on the prepared baking sheet. If you are using sprinkles, decorative sugar or small candies, sprinkle them on when the chocolate is still wet. Repeat with remaining chocolate and pretzels.
4. Place the pretzels in the refrigerator for about 30 minutes to set the chocolate (or just leave out overnight- this is what I do).

Wednesday, February 27, 2013

Raspberry cake with white chocolate raspberry mousse filling

This week I had the pleasure of making a cake for one of the most special people in my life- my Mom. She turned 60 years young earlier this month and I organized a little surprise party in her honor on Sunday. Of course, I just had to make the cake myself! :) And since mama likes moist cakes only, and frosting that is not too sweet, I had to think of something extra special, for a special lady like her. This is how the raspberry cake with white chocolate raspberry mousse filling and whipped cream cream cheese frosting was born. The whole process did take three days to complete, as there were quite a few steps to it, but it was quite worth the effort. The decorations were buttercream frosting borders and writing and an assortment of fresh flowers in the corners. It turned out feminine, delicate and pretty, just like my mama (or "baba" as my kids call her :)).

Raspberry cake

Ingredients:
2 cups white sugar
1 (3oz) package raspberry flavored Jell-o
1 cup butter, at room temperature
4 eggs, at room temperature
2 3/4 cups sifted cake flour
2 1/2 tsp baking powder
1 cup whole milk, at room temperature
1 tbsp vanilla extract
1/2 cup raspberry puree made from frozen, thawed raspberries

Directions:

  1. Preheat the oven to 350 degrees F (175 degrees C). Grease and flour two 9 inch round cake pans.
  2. In a large bowl, cream together the butter, sugar and dry raspberry gelatin until light and fluffy. Beat in eggs one at a time, mixing well after each. Combine the flour and baking powder; stir into the batter alternately with the milk. Blend in vanilla and rasberry puree. Divide the batter evenly between the prepared pans.
  3. Bake for 25 to 30 minutes in the preheated oven, or until a small knife inserted into the center of the cake comes out clean. Allow cakes to cool in their pans over a wire rack for at least 10 minutes, before tapping out to cool completely.
I made my cake in two 9x13 inch pans and baked for 27-30 minutes. Cooled and filled with white chocolate raspberry mousse.

White Chocolate Raspberry Mousse

Ingredients:

1 (10 oz) package frozen raspberries, thawed
2 tbsp white sugar
2 tbsp orange liqueur
1 3/4 cups heavy whipping cream
6 oz white chocolate, chopped
1 drop red food coloring

Directions:
  1. Process berries in a blender or food processor until smooth. Strain mixture into a small bowl, and discard seeds. Add the sugar and liqueur, and stir until sugar dissolves. Makes 1 cup of sauce.
  2. In a heavy saucepan on low heat, warm 1/4 cup of the cream and the white chocolate, stirring constantly until chocolate melts. Let mixture cool until it is lukewarm. Stir in 1 tablespoon of raspberry sauce, and the food coloring. Transfer to a large bowl.
  3. In a medium bowl, whip remaining 1 1/2 cup cream to soft peaks. Fold into melted chocolate mixture, one-third at a time, until no streaks remain.
  4. Fill or ice a cake (or serve in parfait cups layered with the rest of the raspberry sauce for a delicious dessert in its own right).

    Since I had extra raspberry sauce, I mixed the remainder with 1 tsp unflavored gelatin dissolved in 1-2 tbsp boiling water and used that to put between the layers of the cake, before I put the mousse. This way, some of the raspberry sauce seeped in the cake and made it even more flavorful and moist. It looked pretty when cut too. :)

Whipped cream cream cheese frosting: 

Ingredients: 

1 (8oz) package cream cheese
1 cup white sugar
1/8 tsp salt
1 tsp vanilla extract
1 1/2 cups heavy whipping cream

Directions:
  1. In a small bowl beat whipping cream until stiff peaks form; set aside.
  2. In a large bowl combine cream cheese, sugar, salt and vanilla. Beat until smooth, then fold in whipped cream.
  3. Since I was concerned about the frosting not being stiff enough to hold its shape, I followed a suggestion given by one of the reviewers of this recipe. I dissolved 1 tsp unflavored gelatin in 1-2 tbsp boiling water. I strained out any lumps. While beating the finished frosting very fast with mixer, I poured in the hot gelatin mixture. I kept beating for a minute or two until it was well mixed (if not there will be lumps of gelatin). The frosting held its shape for a few days but was still not stiff enough for me to pipe the borders with (as you can see in the picture below, it was hard to make it smooth when frosting too). For the borders and the writing, I ended up making a small batch of my tried-and-true buttercream frosting standby which is too sweet to frost the entire cake with, but which works beautifully for decorating.

Buttercream Frosting

Ingredients:

1 cup (2 sticks) butter, room temperature
4 cups confectioners' sugar
1/8 tsp salt
1 tsp vanilla extract
4-5 tbsp heavy whipping cream

Directions:
  1. In a mixing bowl, cream butter until fluffy. Gradually add sugar, and continue creaming until well blended.
  2. Add salt, vanilla, and 3-4 tbsp whipping cream. Blend on low speed until moistened. Add an additional 1-2 tbsp whipping cream if necessary. Beat at high speed until frosting is fluffy.

Recipe links:

Raspberry cake:
http://allrecipes.com/recipe/strawberry-cake-from-scratch/detail.aspx?event8=1&prop24=SR_Title&e11=strawberry%20cake%20from%20scratch&e8=Quick%20Search&event10=1&e13=A%3aSearch%20Results-List%28control%29&e7=%2fmy%2frecipebox%2fdefault.aspx

White chocolate raspberry mousse:
http://allrecipes.com/recipe/raspberry-white-chocolate-mousse/detail.aspx

Whipped cream cream cheese frosting:
http://allrecipes.com/recipe/whipped-cream-cream-cheese-frosting/detail.aspx


Thursday, February 21, 2013

Mint Chocolate Cupcakes

These cupcakes have quite a story behind them... Where do I begin!? As you know, I am a floral designer, so the week of Valentine's Day is one of the craziest weeks in the year for me. At the end of the day- Feb 14 that is- I went home totally and thoroughly exhausted after 11 hours of non-stop running (for everybody out there who thinks flower arranging is all fun and games, try doing it on Valentine's Day please:))). Anyway, I get home and I am thinking my looong and exhausting day- and week- is finally over only to find out that actually, there was a lot more drama happening at home while I was completely unawares. Our little 3 year-old independent daughter decided to disappear on her father and grandmother! The day turned into a frantic search, involving the police from two towns, half the neighborhood up in arms looking for the little missing girl, the pastor from our church searching along with my husband, our whole house being turned upside down by the police officers and so on, and so forth. My mother and husband must have been out of their minds, and I can only thank God that they didn't call me at work to tell me what was going on, because I am pretty sure I would have had a nervous break down... Most importantly, after what seemed an eternity to my family but was only about 45 minutes in real time, the little wanderer was discovered in a neighbors' back yard three houses over playing in dirt and mud but realizing she was in trouble (after she saw all the police gathered around). All is well that ends well, they say! Now we have to figure out how to install a low jack on her I guess, in case she decides to take off again like that (I sure hope not!!).

So, these cupcakes were made especially for the police department in our town as a big thank-you for their quick response and invaluable help in finding our roving daughter. My husband delivered them this morning, after I promptly took my pictures for this blog. :)

And after you've heard the dramatic story behind these cupcakes, here is the recipe...

Mint Chocolate Cupcakes
Ingredients:
  • 1 3/4 cups all-purpose flour
  • 1 3/4 cups sugar
  • 3/4 cup cocoa powder
  • 2 tsp baking soda
  • 1 tsp baking powder
  • 1/2 tsp kosher salt
  • 1 cup buttermilk, shaken
  • 1/2 cup vegetable oil
  • 2 eggs, room temperature
  • 1 tsp vanilla extract
  • 1/2 tsp mint extract or 1 to 2 tsp creme de menthe
  • 1 cup hot water
Directions:

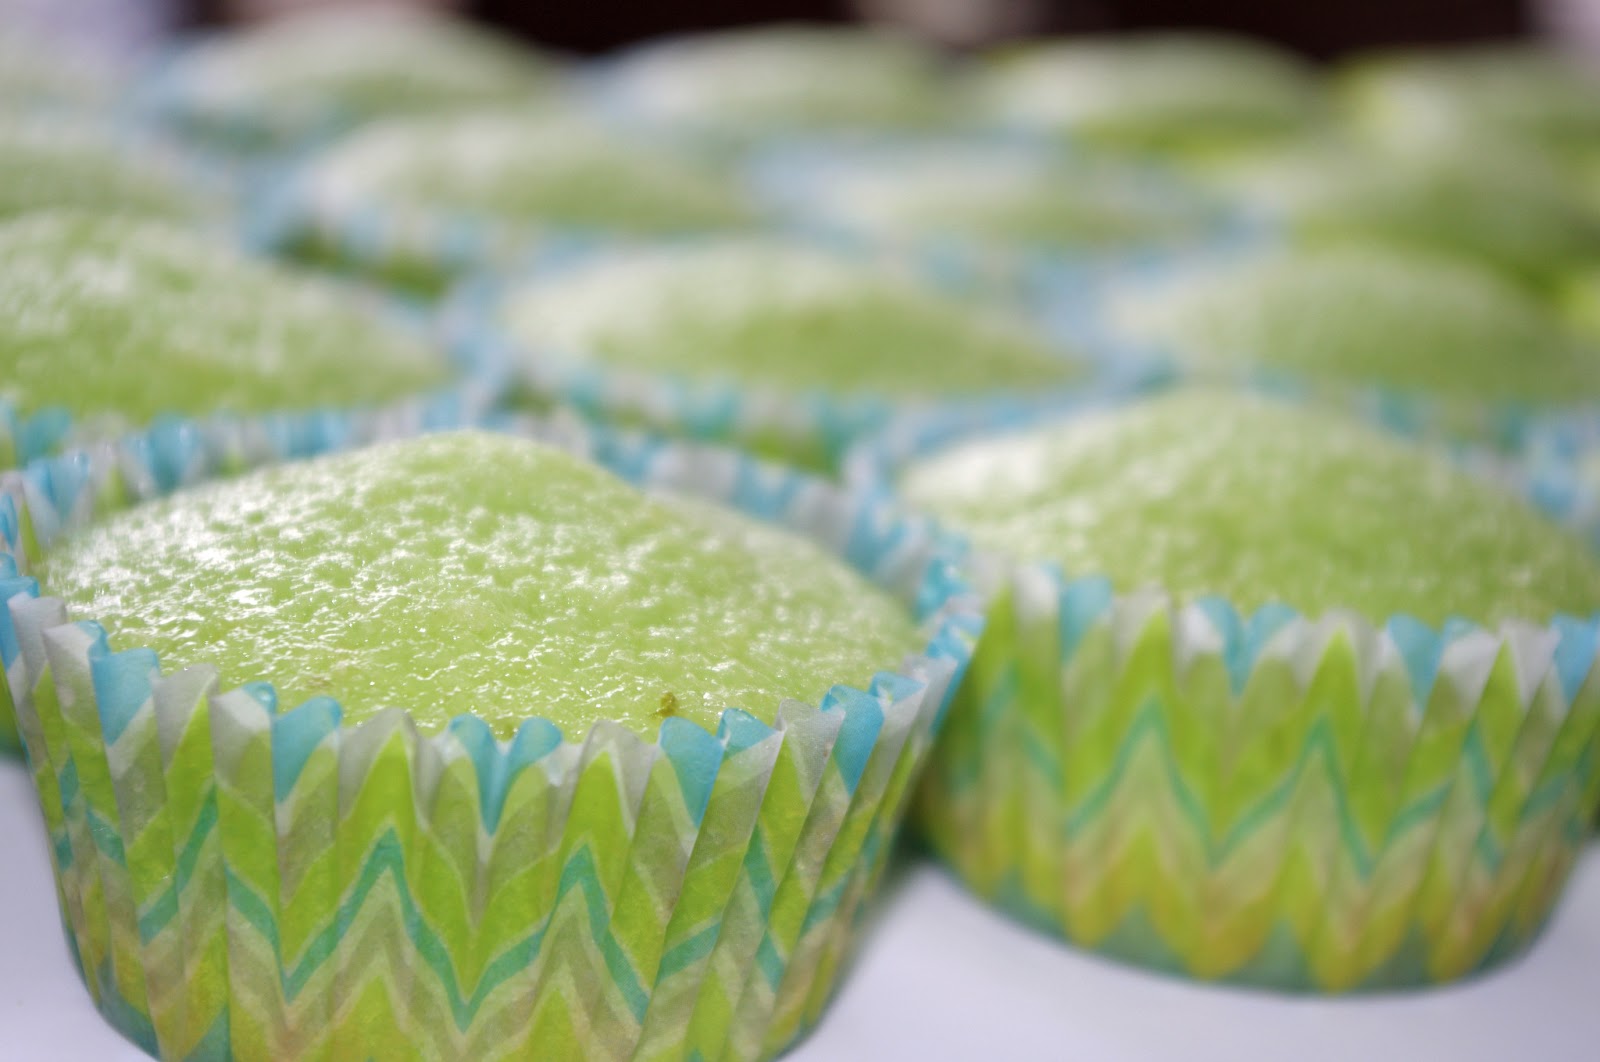
Preheat the oven to 350 degrees F. Line muffin tins with about 30 cupcake liners (I used green for mine :).

1. Sift the flour, sugar, cocoa, baking soda, baking powder, and salt into the bowl of an electric mixer fitted with a paddle attachment and mix on low speed until combined.
2. In another bowl or large measuring cup, combine the buttermilk, oil, eggs, and vanilla. Gently whisk.
3. With the mixer on low speed, slowly add the wet ingredients to the dry. With mixer still on low, add the hot water and stir just to combine – scrape up from the bottom to make sure all the flour is incorporated. Batter will be very thin.
4. Pour the batter into the prepared muffin tins and bake for 18-19 minutes or until a toothpick inserted in the center comes out clean. Cool in the tins for about 5 minutes, then take them out onto a cooling rack to complete cooling.
 

To carry on with the mint chocolate flavor, I made a chocolate mint ganache in which I dipped the cupcakes after they were cool enough to handle.

Chocolate Mint Ganache

6 oz Andes baking chips
1 cup heavy cream

Bring the whipping cream to a boil in a little saucepan. Watch it carefully, because it may boil over. Put the Andes baking chips in a heat-proof bowl. Pour the hot whipping cream over the Andes chips. Stir a little until the chocolate melts.Dip tops of cupcakes in ganache while it is still melted.


For the frosting, I used my new favorite "magical" frosting, but with a cream cheese and mint twist. It turned out pretty ah-mazing!

Magical Mint Cream Cheese Frosting

Ingredients:

1 1/2 cups granulated sugar
1/4 cup all-purpose flour
3 tablespoons cornstarch
1/4 teaspoon salt
1 1/2 cups milk
1 tsp pure vanilla extract
2 sticks butter, cut into 16 pieces and softened at room temperature
8 oz cream cheese, at room temperature, cut in pieces
1 tsp mint extract or 2 tsp Creme de Menthe
green food coloring

Directions: 

In a medium bowl, combine the sugar, flour, cornstarch and salt. Slowly whisk in the milk until the mixture is smooth. Place a fine-mesh strainer over a medium saucepan and pour the milk mixture through the strainer into the saucepan. Cook the mixture over medium heat, whisking constantly, until the mixture boils and is thick enough that it starts to become difficult to easily whisk. This could take anywhere between 5-10 minutes, for me it is usually ready in exactly 7 minutes. It should bubble quite a bit at the end (be careful of the splatters) and thicken considerably.

Transfer the mixture to the bowl of your stand mixer and cool to room temperature – this is extremely important! If it is even slightly warm, the frosting won’t beat up properly. (It took my mixture a good 2 hours to come to room temperature and it was smooth sailing from there.) You can also refrigerate the mixture overnight. If you do this, make sure to pull it out in time to let it warm back up to room temperature. If you try to proceed with the rest of the recipe and the mixture is too cold, the butter won’t absorb into the frosting properly.

Once the frosting is completely cooled to room temperature (it should have no hint of warmth at all!), pop the bowl on your stand mixer and beat the mixture with the vanilla and mint extracts on low speed until it is well combined, about 30 seconds. Add the butter and cream cheese, one piece at a time, and beat the frosting until all the butter and cream cheese have been fully incorporated, about 2 minutes. Increase the speed to medium-high and let the mixer work its magic. Beat the frosting for 5 minutes, until it is light and fluffy. Let the frosting sit at room temperature until it is a bit more stiff, about 1 hour, or chill if you want a stiffer consistency for piping. I piped mine without chilling it and it was stiff enough.
 

And since my cupcakes were made specifically for thank-you gifts, I made little chocolate Thank-you molds from more Andes baking chips and placed on top of the frosting at the end.  And there you have it: Mint Chocolate Cupcakes! It took a few steps to make them, but the end result was soo worth it! I think they will be a great choice for the upcoming St. Patrick's Day too. :)

Print recipe

Related Posts Plugin for WordPress, Blogger...