Showing posts with label specialty cakes. Show all posts

Friday, February 20, 2015

Breast and Bra Cake :)))

This week, I was asked to make a cake as a practical joke for the birthday of an 80-year-old guy. :) Adult cakes are not my usual kind of work, to say the least, but I didn't really want to say "no" to my husband's coworker (who had planned the joke), plus I do like a challenge every once in a while. So, on with the challenge I ran! :)

Apart from the obvious- that it is a breast and bra cake- it was actually a dark chocolate cake filled with whipped chocolate ganache, frosted with peanut butter frosting, and decorated with my homemade marshmallow fondant and buttercream frosting. I am including all the recipes below, as well as tips on making this particular cake, for any adult cake enthusiasts out there. :)
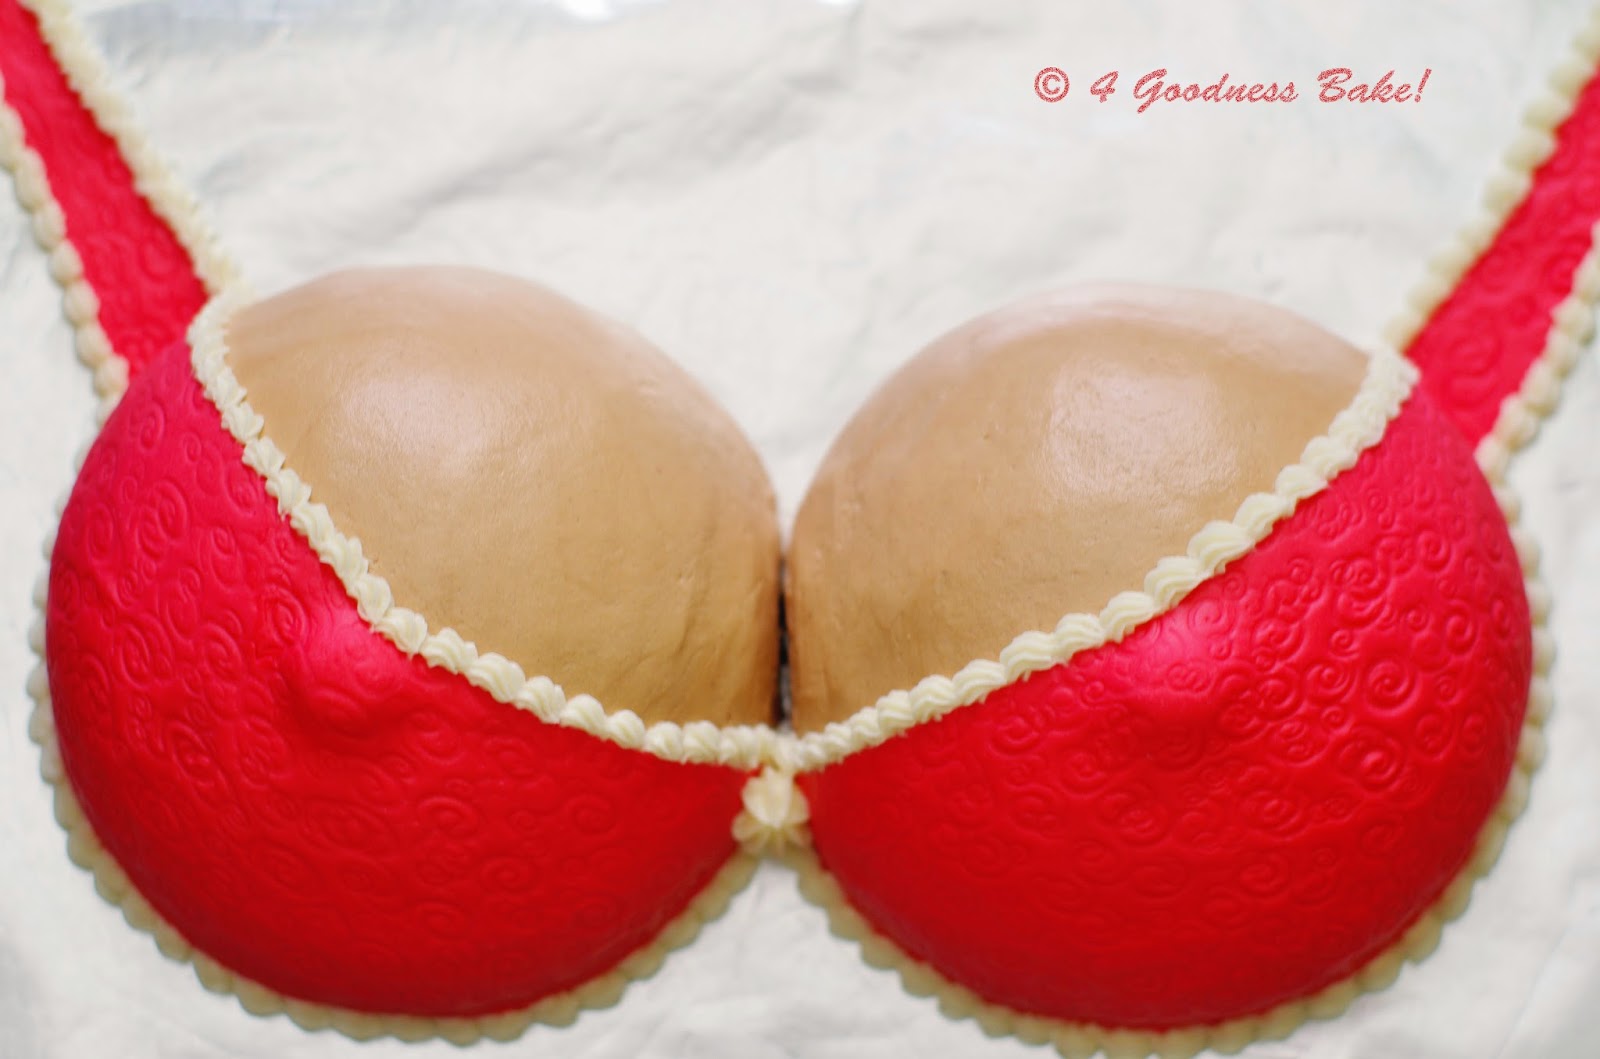

I used two 6" semi-sphere Wilton pans in which I baked my favorite recipe for dark chocolate cake but modified the temperature and baking time to account for the fact that I was working with domes, not regular flat pans. I normally bake this cake at 350F, but in this case I had the oven set at 325F. Also, instead of the usual 25 minutes or so in two 8" round cake pans, I baked these for a little over 30 minutes. Baking the cakes at a lower temperature but for a longer time ensured that they baked more evenly- this way, I avoided overbaking the outside of the cake and having a hard crust. The recipe I have produces a little more batter than is necessary for the two 6" pans, so I just baked a few mini cupcakes with the extra batter. :)

Dark Chocolate Cake

Ingredients:
  • 1 3/4 cups all-purpose flour
  • 1 3/4 cups sugar
  • 3/4 cup cocoa powder
  • 2 tsps baking soda
  • 1 tsp baking powder
  • 1/2 tsp kosher salt
  • 1 cup buttermilk, shaken
  • 1/2 cup vegetable oil
  • 2 eggs, room temperature
  • 1 tsp vanilla extract
  • 1 cup hot coffee
Directions:
Preheat the oven to 325 degrees F. Butter and flour two 6-inch semi-sphere cake pans (or use “PAM for Baking”).

1. Sift the flour, sugar, cocoa, baking soda, baking powder, and salt into the bowl of an electric mixer fitted with a paddle attachment and mix on low speed until combined.

2. In another bowl or large measuring cup, combine the buttermilk, oil, eggs, and vanilla. Gently whisk.

3. With the mixer on low speed, slowly add the wet ingredients to the dry. With mixer still on low, add the coffee and stir just to combine – scrape up from the bottom to make sure all the flour is incorporated. Batter will be very runny, but that is okay- this is a very moist cake!

4. Pour 2 1/2 cups of batter into each of the prepared pans and place them on top of a cookie sheet. This way, the batter that may spill over will end up in the cookie sheet and not all over your oven. The reason for overfilling your pans slightly and even letting them overflow a little is because you want them to bake by filling the pans completely once they are done. Only this way can you have perfect semi-spheres as the final product- you may need to level them off a little bit by cutting the tops slightly. Also, as I mentioned above, this recipe produces a little more batter than you need for this particular size and shape of cake pans, so you can just make a few mini cupcakes with the extra batter (an added bonus!). :)

5. Bake for about 30 minutes or until a toothpick inserted in the center comes out clean. Cool in the pans for 10 minutes, then turn them out onto a cooling rack to complete cooling.


Whipped Chocolate Ganache

Ingredients:
12 oz (about 2 cups) semisweet chocolate chips or chopped chocolate
1 cup heavy whipping cream

Directions:
Bring the whipping cream to a boil in a little saucepan. Watch it carefully, because it may boil over. Put the chocolate in a heat-proof bowl. Pour the hot whipping cream over the chocolate. Stir a little until the chocolate melts and mixture is smooth and glossy- it literally looks like brown velvet! :) Place ganache in refrigerator for about an hour, until ganache has cooled completely but is not yet hard- it should still be spreadable. Beat with electric mixer for about 3-4 minutes, until it becomes the consistency of frosting that can hold stiff peaks. Do not overbeat- it may become grainy! If this does happen, however, do not panic! Just melt the ganache again and run it through a fine-mesh sieve.
Use ready whipped ganache to fill your cake (I cut the dome in two horizontally and cut out some of the middle, to create a hollow spot inside- this became the home for my yummy whipped ganache!)


Peanut Butter Frosting

Ingredients:
1 cup (2 sticks) unsalted butter, at room temperature
1/2 cup creamy peanut butter (not natural)
3-4 cups powdered sugar, sifted
1 tsp vanilla extract
2-3 tbsp heavy cream or half-n-half

Directions:
In the bowl of your electric mixer fitted with the paddle attachment, beat the butter until creamy and smooth. Add the sifted powdered sugar, one cup at a time, beating on low. Mix in the peanut butter and the vanilla extract. Add the heavy cream, one tablespoon at a time, until frosting reaches your desired consistency. Frost the outside of your cake with a crumb coating- a thin layer of frosting, just to seal in the crumbs, so to say. Leave for about 30 minutes or more. Apply final layer of frosting and smooth out with a large offset spatula. Leave to dry out a little bit- another 30 minutes or more. Using a Viva paper towel, pat the frosting very carefully with your hands and smooth out any imperfections. The resulting surface should be as smooth as a lady's skin. :)))


Marshmallow Fondant

Ingredients:
16 oz mini marshmallows
1/4 cup water
1 tsp vanilla extract
2 lbs powdered sugar, divided
1/4 cup vegetable shortening

Directions:
Place the marshmallows in a large microwave-safe bowl, and microwave on High at 30 second intervals for about 1 to 1-1/2 minutes to melt the marshmallows. Carefully stir the water and vanilla extract into the hot marshmallows, and stir until the mixture is smooth. 

Transfer mixture (it will be very sticky) to the bowl of your electric mixer which you sprayed liberally with PAM or greased with vegetable shortening. Use the dough hook attachment. 
* (See note below). Beat in the confectioners' sugar, a cup at a time, until you have a sticky dough. Reserve 1 cup of powdered sugar for kneading. The dough will be very stiff. Continue kneading the fondant until the dough is smooth and no longer sticky to the touch (about 5-7 more minutes). 

Form the fondant into two balls, grease them with vegetable shortening (this prevents them from drying), wrap them tightly in plastic wrap, and refrigerate overnight. To use, allow the fondant to come to room temperature, and roll it out onto a flat surface dusted with confectioners' sugar (or if you prefer, use vegetable shortening instead- that's what I did). For this cake, I rolled out the fondant with a rolling pin that had a squiggly pattern on it, to replicate a fabric texture. I was pretty happy with the way it turned out.

Cut out the fondant into two large triangles and lay each one on the "breasts" for a bra. :) Trim off any excess.


* Note: If you are using all of the fondant in one color, the easiest way is to add your food coloring at this point. However, if you need different colors, then you will have to add the coloring after the kneading stage, when you separate the fondant, and work it in by hand while kneading- I suggest using latex gloves for this, to avoid technicolor hands. :)


Finally, I used Buttercream Frosting for making the lace on the bra after I placed the fondant, and also for the writing on the cake.

Ingredients: 
1 stick unsalted butter, at room temperature
2 cups powdered sugar, sifted
1/2 tsp vanilla extract
2-3 tsp heavy cream or half-n-half

Directions:
Beat butter in the bowl of your electric mixer fitted with the paddle attachment until it is light and fluffy. Add powdered sugar gradually and beat until smooth. Add vanilla extract and cream (1 teaspoon at a time). Add desired food coloring, if using, and pipe frosting on your cake. 


I adapted the following fondant recipe: marshmallow-fondant

Thursday, June 14, 2012

Beachy cake for end-of-year school party :)

I got to make another cake for Anna's teacher, this time for the end-of-year school party. :) Anna thought that vanilla cake would be best since most people like that flavor. I used my favorite vanilla cake recipe (too see it, click here) and frosted the cake with vanilla buttercream (recipe below) and put fresh strawberries between the two layers since they are in season right now and so yummy. :)


I frosted the whole cake in a very light blue buttercream, then decorated it with a shell border (both top and bottom), sea weed, and starfish. I also put a big smiling sun on top, reminiscent of a first grader's drawing. :)


I just realized that although I have been posting a lot of pictures of my cakes and cupcakes frosted with buttercream, I never actually posted my recipe for it. So, I am correcting this mistake right away... :)

Vanilla Buttercream

Ingredients: 
1 1/2 cup (3 sticks butter), at room temperature
1/2 cup shortening
1/2 tsp salt
8 cups (about 2 lbs) powdered sugar, sifted
1-2 tsp vanilla extract (or the flavor of your choice)
5-6 tbsps (or more) heavy whipping cream, or half-and-half, or whole milk

Directions: 
In the work bowl of your stand mixer, beat butter and shortening on medium-high until very smooth and creamy (2-3 minutes). 
Add sifted powdered sugar gradually (covering your mixer with a towel to avoid clouds of powdered sugar all over your kitchen), and continue creaming until well blended. 
Add salt, vanilla, and  whipping cream/ half-and-half/ milk. Blend on low speed until moistened. Add additional 1-2 tabsps whipping cream if necessary. Beat at high speed until frosting is fluffy.


Wednesday, May 9, 2012

Very berry vanilla cake

Last night, I baked a cake for my daughter's 1st grade teacher, since it is teacher appreciation week. Anna loves Mrs. Lugones, so she requested a cake that is as special as the bond the two of them share. She chose vanilla berry "poke" cake. It was an 8-inch two-layer vanilla cake "poked" with raspeberry jell-o, filled with my homemade blueberry/strawberry jam, and frosted with a strawberry buttercream.
The recipe for the vanilla cake is the same one I have been using for a while now- my favorite! You can get it by clicking here. 

 
I decorated the cake all very girly-girl- just like my little Anna- with lots of pink roses and drop flowers. :)


Anna wanted to write "To the best teacher- Mrs. Lugones. Love, Anna". So, that's what we did. A lot yummier than a simple thank-you card. :)


The side of the cake had little drop flowers. The bottom had a "shell" border, again in pink, with lots of green leaves throughout.


The border was made of roses with little pearls and green leaves.

Not surprisingly, after all this, Anna's teacher was tickled "pink" :))))

Tuesday, May 8, 2012

Peaches and cream cake

Happy Birthday to me! :))) This is the cake I baked for my birthday this year. It was three layers of classic sponge cake, also called pan di spagna, or genoise. The fillings were vanilla pastry cream and my homemade peach jam. I used stabilized whipped cream frosting for the rose design on the top and sides. And I soaked the cake with a classic sugar soaking syrup. After two days of whisking, mixing, baking, stirring, and piping, I ended up with an extremely moist, beautiful and decadent cake- very much European and very much what I grew up eating as a child back in Bulgaria. I guess you could call it a nostalgic cake. :)

Sponge cake is a cake that uses only beaten eggs to give it volume, no baking powder or baking soda are added to it.  It requires a lot of whisking, but if you have a stand mixer, you should have no problems with it. :) It is very light and fluffy and can serve as the base for a multitude of layered cakes.

Ingredients

8 eggs, separated into yolks and whites
190 g/ 6.7oz sugar
95g/ 3.3oz all-purpose flour, sifted
55g/ 2oz corn starch, sifted
45g/ 1.6oz butter, melted
1 tsp vanilla extract


Directions

Preheat oven to 350F. Lightly grease and flour a 10-inch round spring-form cake pan. Line it with parchment paper.

Place egg yolks in the bowl of your electric stand mixer. Whisk on high speed until creamy. After 1 minute, add 2 tbsps of the sugar. Continue to mix for a couple more minutes, until the mixture becomes thicker. Add vanilla extract. Keep mixing until the mixture doubles in volume. Turn off mixer. Transfer egg yolks to a separate bowl.

Thoroughly wash mixer bowl and whisk attachment. Make sure they are washed extremely clean; if not, any fat that remains on these utensils will negatively affect the mixing of the egg whites. Place the egg whites in the clean mixer bowl. Whip them on high until they become white and frothy. Slowly add sugar a little bit at a time. Once the mixer is nice and stiff, turn off the mixer. The whipped egg whites mixture is ready when it clings to the whisk attachment and does not drip.

Pour the egg yolks over the egg whites and fold them in with a rubber spatula. Make sure you do not over-mix!

Combine flour and corn starch in a sieve.Slowly sift them into the egg mixture. Sifting the flour will make the cake lighter. Fold together remembering not to over-mix.

Finally, add melted butter, combing it in briefly.

Using a rubber spatula, transfer the batter into the lined cake pan. Spread evenly. Give the pan a few good shakes to remove air bubbles. 
Bake at 350F for about 27-30 minutes. Test with a wooden skewer. The cake is ready when the skewer comes out batter-free. Set aside to cool before removing it from the pan. Once it is cool, run a very sharp knife around the edge of the cake. Remove spring form pan. Fill and frost with your choice of fillings and frosting.

If you prefer a very moist cake, as I do, you can soak it with some simple sugar syrup.

Simple soaking syrup
1/2 cup sugar
1/2 water
1/2 tsp vanilla extract or your favorite flavor extract
Mix together the water and sugar in a small pot. Bring to a boil, and stir until the sugar is dissolved. Remove from the heat, mix in vanilla extract and cool before using. When cool, sprinkle or brush on cake.

The stabilized whipped cream frosting was a new recipe I tried and was very happy with. I will be posting the recipe in a later blog post. It is not only light, fluffy and delicious, but it also holds up extremely well after being piped- two, three, even four days! Highly recommended!

The vanilla pastry cream was time-consuming but so worth it! I will definitely be making it again- and will post the recipe very soon.

For video tutorial on how to make the sponge cake, see: http://www.youtube.com/watch?v=yI3PQ1baI4U

Monday, April 16, 2012

Carrot Cake for Easter

Happy Easter to all my Christian Orthodox  friends! We went to a party yesterday and I made this carrot cake to take there. I decorated it with jelly beans in bright colors, so the kids have fun. :) This cake is THE best carrot cake you will have in your life! I absolutely guarantee it! I am forever grateful to our friend, Don Cotrell, for sharing this recipe with me!


Ingredients: 

2 cups all-purpose flour
2-1/4 tsps baking soda
1 cup vegetable oil
2 tsps cinnamon
3 large eggs
2 cups grated carrots
1/2 cup chopped walnuts (optional)
1/2 tsp salt
2 cups white sugar
8 oz crushed pineapple with the juice
1-1/2 cups shredded coconut

1. Preheat oven to 350 F. Grease and line two 8 or 9 inch round cake pans with parchment or wax paper.

2. Mix flour, salt, baking soda and cinnamon together.

3. Separately, beat oil, sugar and eggs WELL.

4. Add the flour mixture to the egg mixture

5. Fold in pineapple, carrots, coconut and walnuts (if using)

6. Bake at 350 F for about 40-45 minutes (but you may start checking at 35 minutes because different ovens take different time).

Note: One trick I have started using when baking my cakes is wrapping a wet tea towel around the cake pans and securing it with a pin (one that is all metal, no plastic on it), then baking the cakes just like that in the oven- don't worry, the towels don't burn because they are wet- they just dry out and brown- make sure you use old towels for this. :) This way, the cakes bake very evenly on top and the sides do not get too hard in order for the center to bake through- which seems to be a tendency for this particular recipe, as wonderful as it is. The wet towel strips around the cake pans during baking totally solved this problem for me and the cake was extremely moist throughout. Give this a try! Of course, you could also use ready store-bought baking strips from stores such as AC Moore but the tea towels work great for me. :)


I frosted the cake with a simple Cream Cheese Frosting:

Ingredients
:

1 stick unsalted butter, at room temperature
8 oz cream cheese, at room temperature
4 cups powdered sugar, sifted
2 tsps vanilla extract

Cream the butter and cream cheese well. Add the powdered sugar gradually, covering your stand mixer with a towel to avoid sugar flying all over the place. :) Add vanilla extract and beat until fluffy.

This frosting can be made with a lot less sugar but for my purposes, I need it stiffer in order to pipe it when decorating, so the 4 cups make just the right consistency- and I haven't had anybody complain about it being too sweet. :)

Special thanks for this fabulous carrot cake recipe to my husband's co-worker, Don Cotrell. This one is a keeper!

Saturday, April 14, 2012

Guitar cake

I made this guitar cake last May but I just realized today that for some strange reason I never put it up my blog. Shame on me! So, I am hurrying up to rectify this omission. :) It was actually one of the most challenging and rewarding cake projects I have ever undertaken. When I agreed to make it, I knew I could do it. I just didn't have a clear idea of how long it would take. :) It was fun (and daunting at times) but so worth the experience! The whole cake was covered in buttercream (even though it may look like fondant- but this is just because of my amazing skills at smoothing buttercream out to perfection :))). And even though it may look like chocolate buttercream, it was actually regular vanilla with brown gel food coloring (Wilton) because this was what my friend requested- vanilla cake on the inside too. The cake was in fact for her son  who was graduating from high school and going to study guitar in college in the fall, so we gave him a guitar cake. :)


I followed pictures of a real classical guitar, created my own template and tried to make the cake as authentic as possible. The research and planning process took me a couple of weeks. :) Making the actual cake- three days. :) 


It turned out 26 inches long! 


And here is the cake with the personalized text on it:


And here is the pat on the back I got from my friend who ordered the cake:


"The graduate LOVED it... And so did the rest of the family. Yum! ... The cake was not only beautiful, it was delicious! We gobbled it up. Thank you! Your cake making skills are incredible!"

Monday, April 9, 2012

Lemon-raspberry rose cake

We had very special friends visiting from out of state this past weekend. We hadn't seen them in almost five years, so we were thrilled! Needless to say, I just had to make a special cake for their visit. I baked a lemon layer cake (which was my vanilla cake recipe with the zest of 1 lemon and 1 tsp lemon extract added to the batter- click here for the vanilla cake recipe). Then, I made a raspberry mousse filling out of raspberry fruit yogurt, whipped cream and gelatin. To add a little more of the raspberry flavor, I "poked" the cake and soaked it with raspberry jello (before it had set). It was pretty to look at too, once we cut into it, plus it produced a very moist cake. The frosting I made was a lemon-flavored buttercream which I actually mixed with cream cheese to make it more tangy. This, however, didn't work 100% successfully with my idea of making a rose-covered cake because the cream cheese frosting made the roses on the side of the cake "sag"- as you can see on the pictures. So, next time I make a rose cake, I will definitely be using a stiff consistency buttercream. I do like the rose design and will be making it again in the future.


A close-up of the roses on top. I sprinkled some pink "fairy dust" (as my daughter calls it) and pearls on top, to make it even more feminine.

And this is how it looked when we cut into it:

Friday, October 14, 2011

Flower Fairies Birthday Cake

Sheet cake which had to look like a garden with a lot of flowers and flower fairies: my daughter's favorite thing lately! :) 
Half vanilla, half chocolate on the inside with vanilla custard, whipped cream and bananas in between :)

How it started:

How it ended:

Thursday, June 16, 2011

Guitar Cake

This was a guitar cake for a high-school graduation.
Lots of fun to make and i was really pleased with how it came out, so were my customers! :)


Testimonial:
"Nadia, the cake was not only beautiful, it was delicious! We gobbled it up. Thank you! Your cake making skills are incredible!"

Friday, May 6, 2011

Mother's Day Cake

This was a lemon cake with buttercream frosting I made for Mother's Day. It had a basket weave on the side and buttercream roses on top: special, feminine and dainty- just like my Mom! It was worth the extra time I spent on it: Mom loved it!


Lemon Cake
Ingredients:
2 1/2 cups all-purpose flour
1 teaspoon baking powder
1/2 teaspoon baking soda
1/2 teaspoon salt
3 large eggs
2 cups granulated sugar
1 cup vegetable or canola oil
1 cup sour cream
1 teaspoon pure vanilla extract
1 teaspoon lemon extract
zest of one large lemon
freshly squeezed juice from one large lemon
1/2 cup milk
 
Directions:
Preheat oven to 350F. Grease and line two 9-inch round baking pans with parchment paper.
 
In a medium size bowl, whisk together flour, baking powder, baking soda and salt.
 
In the bowl of your electric mixer, beat eggs and sugar until thick and creamy (about 2 minutes).
Blend oil and sour cream. Add vanilla and lemon extracts, lemon zest, and lemon juice. Mix to incorporate.
 
Add flour and milk, alternating- starting and finishing with flour.
Divide batter evenly between the two pans. Bake about 28-30 minutes or until they test done. 
 
 
Vanilla Buttercream FrostingIngredients:
1 1/2 cup (3 sticks butter), at room temperature
1/2 cup shortening (I know, it's not the best thing for you, but you need it to give stability to the frosting, especially if you are going to be piping a basketweave, as in this case)
1/2 tsp salt
8 cups (about 2 lbs) powdered sugar, sifted
1-2 tsp pure vanilla extract (or the flavor of your choice)
5-6 tbsps (or more) heavy whipping cream, or half-and-half, or whole milk

Directions:
In the work bowl of your stand mixer, beat butter and shortening on medium-high until very smooth and creamy (2-3 minutes). 

Add sifted powdered sugar gradually (covering your mixer with a towel to avoid clouds of powdered sugar all over your kitchen), and continue creaming until well blended. 

Add salt, vanilla, and  whipping cream/ half-and-half/ milk. Blend on low speed until moistened. Add additional 1-2 tbsps whipping cream if necessary. Beat at high speed until frosting is light and fluffy.                

* Note: This frosting recipe produces a lot of frosting, but if you are going to be piping a basketweave on the sides and roses on top, you will need to have enough, and a little bit leftover. My grandmother always used to say, "In order to have enough of anything, you should really have leftovers". :)


Sunday, April 24, 2011

Easter Egg Basket Cake

This was the Easter Egg Basket Cake I made this Easter. It was lemon cake with lemon curd filling and buttercream frosting for the grass and the basket weave. The Easter eggs on top were candy melt pops I made a couple of days in advance and the handle I rolled out of fondant reinforced with wire in the center. Read on for the recipes... :)

 
Lemon Cake
Ingredients:
2 1/2 cups all-purpose flour
1 teaspoon baking powder
1/2 teaspoon baking soda
1/2 teaspoon salt
3 large eggs, at room temperature
2 cups sugar
1 cup canola oil
1 teaspoon pure vanilla extract
1/2 teaspoon lemon extract
1 cup sour cream
the zest of 1 lemon
the juice of 1/2 lemon
1/2 cup milk
 
Directions:
Preheat oven to 350F. Grease two 9-inch round pans and line with parchment paper.
 
In a medium-sized bowl, whisk together flour, baking powder, baking soda and salt. Set aside.
 
In the bowl of your electric mixer, beat eggs and sugar until thick and creamy (about 2 minutes).
Blend vanilla, lemon extract, oil, sour cream, lemon zest, and fresh lemon juice. Add flour and milk, alternating- starting and finishing with flour.
Pour in pans. Bake 25-30 minutes or until they test done. Cool before filling and frosting.
 
You can certainly use a ready, store bought lemon curd for the filling, or you can make your own., such as this delicious recipe, courtesy of Alton Brown:
 
Lemon Curd
Ingredients:
5 egg yolks
1 cup sugar
4 lemons, zested and juiced
1 stick butter, cut into chunks and chilled
 
Directions:
Add enough water to a medium saucepan to come about 1-inch up the side. Bring to a simmer over medium-high heat. Meanwhile, combine egg yolks and sugar in a medium size metal bowl and whisk until smooth, about 1 minute. Measure citrus juice and if needed, add enough cold water to reach 1/3 cup. Add juice and zest to egg mixture and whisk smooth. Once water reaches a simmer, reduce heat to low and place bowl on top of saucepan. (Bowl should be large enough to fit on top of saucepan without touching the water.) Whisk until thickened, approximately 8 minutes, or until mixture is light yellow and coats the back of a spoon. Remove promptly from heat and stir in butter a piece at a time, allowing each addition to melt before adding the next. Remove to a clean container and cover by laying a layer of plastic wrap directly on the surface of the curd. Refrigerate for up to 2 weeks.

Recipe for lemon curd courtesy of Alton Brown: www.foodnetwork.com


The buttercream frosting I used for this cake is admittedly extremely sweet (too sweet for my husband's taste for sure) but it is ideal for piping work, especially for the basket weave technique as in this cake. The saving grace here is that the cake is lemon with lemon curd filling, so the sweetness of the frosting is balanced with the tanginess of the lemon flavors in the cake.

Buttercream Frosting
Ingredients: 

1 1/2 cup (3 sticks butter), at room temperature
1/2 cup shortening (I am not crazy about this, but it does make the frosting stable for piping)
1/2 tsp salt
8 cups (about 2 lbs) powdered sugar, sifted
1-2 tsp vanilla extract (or the flavor of your choice)
5-6 tbsps (or more) heavy whipping cream, or half-and-half, or whole milk

Directions: 
In the work bowl of your stand mixer, beat butter and shortening on medium-high until very smooth and creamy (2-3 minutes). 

Add sifted powdered sugar gradually (covering your mixer with a towel to avoid clouds of powdered sugar all over your kitchen), and continue creaming until well blended. 

Add salt, vanilla, and  whipping cream/ half-and-half/ milk. Blend on low speed until moistened. Add additional 1-2 tbsps whipping cream if necessary. Beat at high speed until frosting is fluffy. Frost your cake and enjoy!                 


Sunday, April 17, 2011

Flower Basket Cake

I made this cake with basket weave from buttercream frosting. The flowers are mainly royal icing and the handle is fondant and gum paste. The cake itself is chocolate with my homemade sour cherry preserves as a filling. It was delicious, if I may say so myself. :)


Wednesday, March 2, 2011

Tuesday, January 25, 2011

dinosaur cake


the inside was: chocolate, marble and yellow layers with vanilla pudding in between. frosting was buttercream in various colors.

Tuesday, August 10, 2010

Ladybug Cake

Ladybug cake using minimal decorating skills. Actually, my 5-year-old daughter helped decorate that. :)

Sunday, April 4, 2010

Easter Bunny Cake

This is an Easter cake both kids and adults will thoroughly enjoy! It's a fun project for children, as you can let them decorate it once it is assembled. All the children at our party were thrilled with it and the adults appreciated the gourmet taste of the cake itself- it was Hummingbird Cake with Cream Cheese Frosting. Divine!


Hummingbird Cake
Ingredients:
3 cups
all-purpose flour                
1 teaspoon baking soda
1 teaspoon salt
2 cups sugar
1 teaspoon ground cinnamon
3 large eggs, beaten
1 cup vegetable oil
1 1/2 teaspoons vanilla extract
1 (8-ounce) can crushed pineapple, undrained
1 cup chopped pecans
2 cups chopped bananas    
    
Directions: 
  1. Combine first 5 ingredients in a large bowl; add eggs and oil, stirring until dry ingredients are moistened. (Do not beat.) Stir in vanilla, pineapple, pecans, and bananas.
  2. Divide batter into four greased and floured 9-inch round cakepans. Bake at 350° for 22- 25 minutes or until a wooden pick inserted in center comes out clean. Cool in pans on wire racks 10 minutes; remove from pans, and cool completely on wire racks.
  3. Divide the layers two by two, as though you are making two cakes. Spread Cream Cheese Frosting between layers. Cut one of the cakes, so you have two "ears" on the sides and the middle is the "bow tie".  The other round cake use as the face of the bunny. Assemble and frost the top and sides of the cake. Decorate with jelly beans, licorice, etc to resemble a bunny-my daughter had a blast doing this! Store in refrigerator. Enjoy!        


Cream Cheese Frosting:

Ingredients
2 sticks unsalted butter, at room temperature
2 pkg (8 oz each) cream cheese, at room temperature
2 lbs powdered sugar
2 tsp pure vanilla extract

Directions:
Beat cream cheese and butter at medium speed with an electric mixer until smooth, about 3-4 minutes. Gradually add powdered sugar, beating at low speed until light and fluffy. Stir in vanilla. Frost.

Recipe courtesy: hummingbird cake


Tuesday, January 26, 2010

Racetrack Cake

I made this figure eight racetrack cake for my son's birthday- this is what he chose from a book.

It was one of my very attempts at decorating a cake and looks pretty rookie but he was happy and that's all that matters!

Print recipe

Related Posts Plugin for WordPress, Blogger...