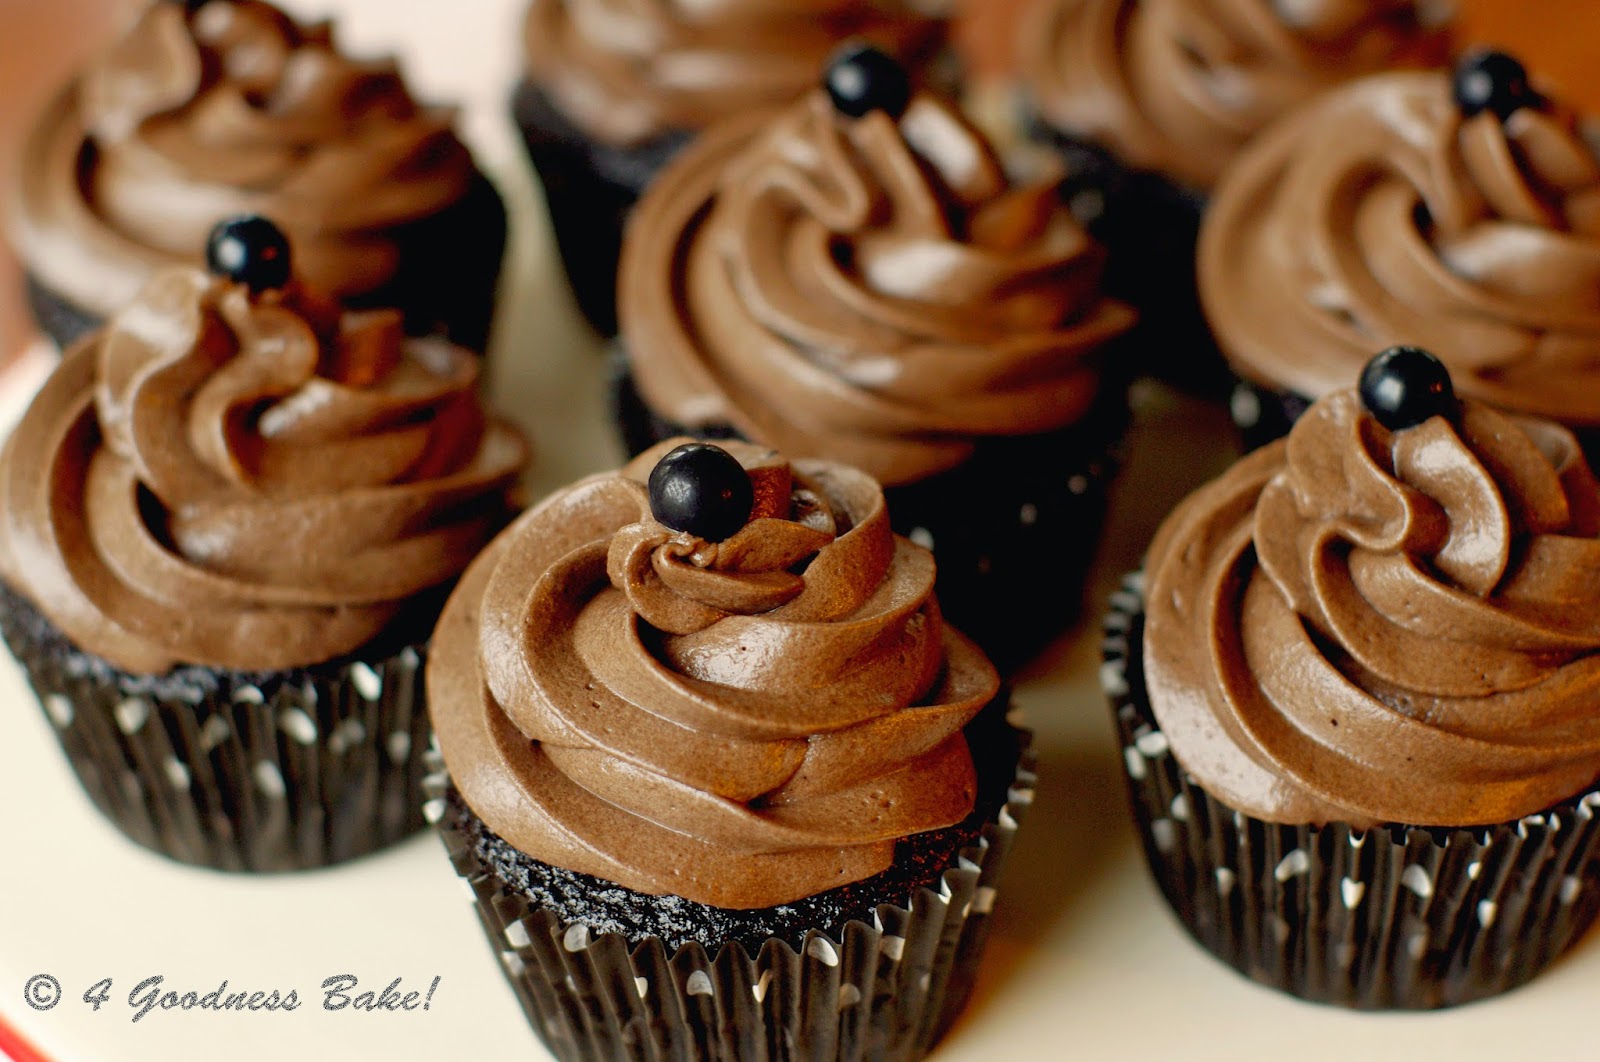
Saturday, May 10, 2014

Cupcake Roses for Mom! :)


Happy Mother's Day to all you, hardworking Moms, everywhere in the world! I hope your family is sweet to you on this very special day, as you deserve it!!! Here is my greeting to you- some cupcake roses to brighten up and sweeten up your day! :)


Lemon CupcakesIngredients:
2 1/2 cups all-purpose flour
1 teaspoon baking powder
1/2 teaspoon baking soda
1/2 teaspoon salt
3 large eggs
2 cups granulated sugar
1 cup vegetable or canola oil
1 cup sour cream
1 teaspoon pure vanilla extract
1 teaspoon lemon extract
zest of one large lemon
freshly squeezed juice from one large lemon
2-3 drops of lemon essential oil
1/2 cup milk
 
Directions:
Preheat oven to 350F. Line muffin tins with paper liners (for cupcakes). This recipe makes about 30 standard size cupcakes.
 
In a medium size bowl, whisk together flour, baking powder, baking soda and salt.
 
In the bowl of your electric mixer, beat eggs and sugar until thick and creamy (about 2 minutes).
Blend oil and sour cream. Add vanilla and lemon extracts, lemon zest,  lemon juice, and lemon essential oil. Mix to incorporate.
 
Add flour and milk, alternating- starting and finishing with flour.
Pour in muffin tins, filling each cupcake about 2/3 of the way. Bake 18-20 minutes or until they test done. Fill with Perfect Lemon Curd and frost with Lemon Cream Cheese Frosting (recipes below).


Perfect Lemon Curd
Ingredients:
1/2 cup (1 stick) unsalted butter, at room temperature
3/4 cup granulated sugar
3 eggs
3/4 cup fresh lemon juice (it took me about 5-6 small lemons!)
1 tbsp. grated lemon zest
 
Directions:
In the bowl of your electric mixer, beat butter and sugar until light and fluffy. Add eggs one at a time and beat well after each addition. Mixture may look a little curdled at first but that's okay, it will smooth our later, I promise you. :) Finally, add lemon juice and zest and mix in to incorporate.
 
Using a double boiler, bring water in the bottom container to a gentle boil, and add mixture to the top container while stirring frequently in the beginning and almost constantly towards the end. Keep stirring over medium to medium-low heat until mixture thickens enough to hold marks from whisk, about 10-15 minutes. Remove from the heat. Cool. Fill your cupcakes with about 1 to 1 1/2 tsp of lemon curd per cupcake. This recipe is enough to fill about 30 cupcakes and can be made up to a week in advance and refrigerated until ready to use (big bonus for me!).

 
Recipe for Perfect Lemon Curd adapted from: allrecipes.com


Lemon Cream Cheese FrostingIngredients:
1/2 cup (1 stick) unsalted butter, at room temperature
1 pkg (8oz) cream cheese, at room temperature
3 to 3 1/2 cups powdered sugar
1 tsp lemon extract
2-3 drops of lemon essential oil (optional)
3-4 tsp heavy whipping cream (or more, if you prefer a thinner consistency)
a few drops of yellow food coloring, if desired

Directions: In the bowl of your stand mixer, beat butter and cream cheese at medium/high speed until light and fluffy, about 3-4 minutes. Gradually add powdered sugar, covering your mixer with the shield attachment or a kitchen towel to avoid a cloud of powdered sugar all over your kitchen. :) Beat until well incorporated. Add lemon extract and essential oil and beat again for another minute or so. Finally, mix in whipping cream, one teaspoon at a time, until the frosting reaches your desired consistency. Add desired food coloring. I used Wilton's gel food colors: Rose (for the pink), Yellow, and some light green for the little leaves. For the roses, start the swirl from the center, working your way outwards. It's really simple but elegant. I hope you make someone very happy with these! :)


Wednesday, May 7, 2014

Black Bean Brownies


If you haven't hopped on the black bean brownie wagon already, you have been missing out big time! And if you are vegan or follow a gluten free diet, these could seriously be a life-saver for you (if you have a sweet tooth like mine, which I admit is pretty much giant) :)... They are extremely simple to make- all you need is a food processor- and once baked, I assure you nobody would be able to tell there are black beans inside! I never told my kids and after having a piece each, they declared, "We don't like these brownies. We LOVE them!". That, I think speaks for itself!

Go on, make a batch of these and see what I mean. They are delicious, rich in protein, high in fiber, and as healthy as a baked dessert could ever get!

Black Bean Brownies

Ingredients:
1 (15 oz) can black beans, drained and rinsed
1/2 cup quick oats or rolled oats processed fine
1/2 cup agave syrup
1/4 cup brown sugar
1/4 cup melted coconut oil or canola oil
4 tbsp cocoa powder
2 tsp pure vanilla extract
1/2 tsp baking soda
1/2 tsp salt
1 cup chocolate chips, divided
1/3 cup chopped walnuts or other nuts of your choice (optional)


Directions:
Preheat the oven to 350 F and grease or line an 8 x 8 inch pan with parchment paper.
Put the beans in a food processor and process until smooth. Add the agave syrup, sugar, and coconut oil and continue to process until smooth and there are no lumps of beans left.
Add the processed oats, cocoa powder, vanilla extract, baking soda and salt and process until combined.
Stir in 2/3 cup of the chocolate chips by hand.
Sprinkle the remaining 1/3 cup chocolate chips and walnuts on top and press lightly into the brownie mixture.
Bake for 20-25 minutes, until the center is set. Allow to cool completely before cutting. You may want to leave them in the refrigerator for a while, as there is no binding agent and the cold will help them set better. Makes 16 brownies.


Recipe adapted from: Butter baking


Tuesday, May 6, 2014

Red Velvet Cupcakes with Whipped Cream Cheese Frosting

These were cupcakes I made for a "Dessert Auction" at my church. :) I had made them once before for a ladies' dinner and they were completely gone, all two dozen of them, so I figured if they were such a big hit once, they should do well at the auction. Apparently, I was right. :) They are truly delicious! They have a chocolate flavor really (because of the cocoa in them), but more like a light chocolate than the dark chocolate cake I usually make. The cream cheese frosting is a perfect accompaniment and can be made with less powdered sugar and less cream if you do not need to pipe the frosting.

 
Red Velvet Cupcakes

Ingredients:
2 1/2 cups all-purpose flour
3 tbsp unsweetened cocoa powder
3/4 teaspoon salt
1 1/2 cups sugar
2 large eggs, at room temperature
1 1/2 cups vegetable or canola oil
1 cup buttermilk (or 2 tbsp white vinegar and the rest milk, to make 1 cup liquid total- let sit 5 min)
2 tbsp liquid red food coloring or 1 tsp gel food coloring
2 tsps pure vanilla extract
2 tsp white vinegar
1 1/2 tsp baking soda

Directions:
Preheat oven to 350 degrees. Line muffin pans with paper liners.
In a large bowl, whisk together cake flour, cocoa, and salt; set aside.

In the bowl of a stand mixer fitted with the paddle attachment, beat sugar and oil on medium-high speed until combined. Add eggs, one at a time, beating until each is incorporated, scraping down sides of bowl as needed. Mix in food color and vanilla.

Reduce speed to low. Add flour mixture in three batches, alternating with two additions of buttermilk and beating until combined after each.

In a small bowl, stir together the baking soda and vinegar (it will foam); add mixture to the batter, and mix on medium speed until combined, about 10 seconds.

Fill the cupcake paper liners 2/3 full. Bake 18-20 minutes or until a toothpick inserted in centers comes out clean. Transfer muffin pans to wire racks to cool completely before removing cupcakes. Frost with Whipped Cream Cheese Frosting (recipe below).

Makes 2 dozen cupcakes.


Whipped Cream Cheese Frosting

Ingredients:
1 stick unsalted butter (1/2 cup), at room temperature
1 pkg (8oz) cream cheese, at room temperature
1 tsp pure vanilla extract
3 1/2 cups powdered sugar
1/2 cup heavy whipping cream (or less if you want to be able to pipe the frosting)

Directions:
In the bowl of your electric stand mixer fitted with the paddle attachment, beat on medium/high speed butter and cream cheese until light and fluffy, about 3-4 minutes. Add vanilla extract. Mix in to incorporate. Gradually add the powdered sugar and cover your mixer with the protective shield or a kirchen towel after each addition to avoid a cloud of powdered sugar in your kitchen :). Once powdered sugar is fully incorporated, remove the paddle attachment with the whisk attachment and add the heavy whipping cream. Whisk on medium/high speed for 4-5 minutes. Frost your cooled cupcakes and enjoy!

Note: this is a thinner, lighter cream cheese frosting and though it still works for piping on cupcakes and frosting cakes, it is not stiff enough for delicate piping decorations as buttercream or regular cream cheese frosting are.

Recipes adapted from these sources: http://sweetpeaskitchen.com, http://everycraving.com and http://ladybugssweettreats.blogspot.com, http://www.melskitchencafe.com

Wednesday, April 30, 2014

Double Chocolate Cupcakes


These were the cupcakes Anna made for her teacher's last day of school today. They had a long-term substitute while their regular teacher was away on maternity leave. Since the substitute teacher spent most of the school year with them, they got very attached to her, so today was a bittersweet day for the class. Anna had asked her teacher what her favorite flavor of cake was and when she heard "chocolate", she knew what she was baking:

Double Chocolate Cupcakes
Ingredients:
1 3/4 cups all-purpose flour
1 3/4 cups sugar
3/4 cup cocoa powder
2 tsps baking soda
1 tsp baking powder
1/2 tsp kosher salt
1 cup buttermilk, shaken
1/2 cup vegetable oil
2 eggs, room temperature
1 tsp vanilla extract
1 cup hot water or coffee

Directions:
Preheat the oven to 350 degrees F. Prepare muffin pans with cupcake liners. This recipe makes about 28-30 cupcakes.

Sift the flour, sugar, cocoa, baking soda, baking powder, and salt into the bowl of an electric mixer fitted with a paddle attachment and mix on low speed until combined.

In another bowl or large measuring cup, combine the buttermilk, oil, eggs, and vanilla. Gently whisk.
With the mixer on low speed, slowly add the wet ingredients to the dry. With mixer on the lowest setting, add the coffee and stir just to combine – scrape up from the bottom to make sure all the flour is incorporated. Batter will be very thin and runny- don't worry!

 Pour the batter into the prepared muffin pans, filling each cupcake only about 2/3, and bake for 18-20 minutes or until a toothpick inserted in the center comes out clean. Cool in the pans for about 5 minutes, then move to a cooling rack to complete cooling.

Frost with your favorite frosting. These, we frosted with:
Chocolate Cream Cheese Frosting.


Ingredients:
1 cup (2 sticks) unsalted butter, at room temperature
1 pkg (8oz) cream cheese, at room temperature
1-2 tsp pure vanilla extract
3 to 4 cups powdered sugar
1/3 cup cocoa powder (I use Hershey's Special Dark 100% Cocoa)
2-3 tbsp heavy whipping cream

Directions:
In the bowl of your electric mixer, beat butter and cream cheese until light and fluffy, about 2-3 minutes. Add vanilla extract and mix to incorporate. Add powdered sugar cup by cup, making sure to cover the mixer with the shield attachment and/or kitchen towel to avoid a cloud of powdered sugar all over your kitchen once you turn the mixer back on. :) Beat until well incorporated. Add cocoa powder and mix well. Finally, mix in heavy cream (or half-n-half) until desired consistency is reached. Frost away and enjoy!

These were the cupcakes Anna gave to her teacher, so she could share with her family... We packaged them in a special "Sweet" container. :)


I also made the teacher a flower arrangement from the class... A bright spring mix! :)

Recipe for cupcakes adapted from: foodnetwork.com

Saturday, April 26, 2014

Super Easy Banana Cream Ice Box Cake


Since I always post recipes I bake from scratch, I thought it was about time I'd include one that is super easy, does not involve baking, and is extremely tasty at the same time. In comes Banana Cream Ice Box Cake. The idea for it evolved as a combination of a Banana Cream Pie Anna makes at home quite often and a recipe for an Éclair Ice Box Cake I kept seeing on Pinterest over and over again. We had a few very ripe bananas at home that needed using up but I wasn't in the mood for baking another banana bread (as great as my recipe is), so I thought I'd go the super easy route this time. But instead of layering the vanilla pudding and the whipped cream- as Anna does in the Banana Cream Pie, I combined the two to create one fluffy light cream that made this dessert irresistible. So, here it is:


Super Easy Banana Cream Ice Box Cake
Ingredients:
18 Graham Crackers
3 bananas, peeled and sliced thinly
1 pkg (3.4 oz) instant vanilla pudding
1 1/2 cups cold milk
1 tub (8oz) Cool Whip, thawed
about 1 cup chocolate ganache to cover top (optional but recommended; * see recipe below)
1/2 chopped walnuts or other nuts (totally optional)
 
Directions:
Combine vanilla pudding with milk and whisk until combined and thickened, about 3 minutes. Add Cool Whip and stir in until you get a homogenous cream.
 
In an 8x8 inch pan, arrange graham crackers on bottom- you will need to break some of them into halves or quarters in order to cover the whole pan. Spoon about 1/3 of the pudding mixture on top of the graham crackers. Arrange banana slices on top, pushing them down a little, to sink them slightly into the cream. Repeat layering crackers, cream, bananas, and again crackers, cream, bananas. Finish with one last layer of crackers.

I had some chocolate ganache left over from another recipe, so I just warmed it up for about 15 seconds in the microwave and drizzled it on top. Then, I sprinkled some chopped walnuts, just because I love them. :) I left the cake in the refrigerator overnight to set. We just enjoyed it for dessert today and everyone raved about it. Not bad for about 15 minutes of work! :)


* For Chocolate Ganache, mix 1/2 chocolate chips with 1 cup of almost boiling heavy whipping cream- stir to melt the chocolate and use as required. It is delicious! If you have any leftover, simply store in the fridge for another week or so. When ready to use, if you need it spreadable again, just warm it up in the microwave for a few seconds and you are good to go!

 
Recipe adapted from: hugsandcookiesxoxo

Thursday, April 24, 2014

Lemon Cupcakes with Perfect Lemon Curd Filling and Lemon Cream Cheese Frosting


These decadent cupcakes were a joint project Anna and I undertook for Easter. She baked the cupcakes and I made the lemon curd and the frosting. She made all the holes for the filling and I filled them. Eating them was a very joint project too! :) Enjoyed by not only the two of us, but everyone else present at the party. People asked to take some home too... How could we blame them? They were irresistible. So, here is the recipe we put together- for the whole world to enjoy too! Go ahead, bake them right away and you can thank us afterwards. :)


Lemon Cupcakes
Ingredients:
2 1/2 cups all-purpose flour
1 teaspoon baking powder
1/2 teaspoon baking soda
1/2 teaspoon salt
3 large eggs
2 cups granulated sugar
1 cup vegetable or canola oil
1 cup sour cream
1 teaspoon pure vanilla extract
1 teaspoon lemon extract
zest of one large lemon
freshly squeezed juice from one large lemon
2-3 drops of lemon essential oil
1/2 cup milk
 
Directions:
Preheat oven to 350F. Line muffin tins with paper liners (for cupcakes). This recipe makes about 30 standard size cupcakes.
 
In a medium size bowl, whisk together flour, baking powder, baking soda and salt.
 
In the bowl of your electric mixer, beat eggs and sugar until thick and creamy (about 2 minutes).
Blend oil and sour cream. Add vanilla and lemon extracts, lemon zest,  lemon juice, and lemon essential oil. Mix to incorporate.
 
Add flour and milk, alternating- starting and finishing with flour.
Pour in muffin tins, filling each cupcake about 2/3 of the way. Bake 18-20 minutes or until they test done. Fill with Perfect Lemon Curd and frost with Lemon Cream Cheese Frosting (recipes below).
 

Perfect Lemon Curd
Ingredients:
1/2 cup (1 stick) unsalted butter, at room temperature
3/4 cup granulated sugar
3 eggs
3/4 cup fresh lemon juice (it took me about 5-6 small lemons!)
1 tbsp. grated lemon zest
 
Directions:
In the bowl of your electric mixer, beat butter and sugar until light and fluffy. Add eggs one at a time and beat well after each addition. Mixture may look a little curdled at first but that's okay, it will smooth our later, I promise you. :) Finally, add lemon juice and zest and mix in to incorporate.
 
Using a double boiler, bring water in the bottom container to a gentle boil, and add mixture to the top container while stirring frequently in the beginning and almost constantly towards the end. Keep stirring over medium to medium-low heat until mixture thickens enough to hold marks from whisk, about 10-15 minutes. Remove from the heat. Cool. Fill your cupcakes with about 1 to 1 1/2 tsp of lemon curd per cupcake. This recipe is enough to fill about 30 cupcakes and can be made up to a week in advance and refrigerated until ready to use (big bonus for me!).

 
Recipe for Perfect Lemon Curd adapted from: allrecipes.com

And here are my filled cupcakes, waiting to be frosted: :)
 
This is what the cupcakes looked like when cut across... And they tasted even better! :)

This was the frosting I made for these super yummy cupcakes. They were a decadent treat, perfect for spring, summer, or any time of year (especially if you a huge lemon fan like me!). :)

Lemon Cream Cheese Frosting
Ingredients:
1/2 cup (1 stick) unsalted butter, at room temperature
1 pkg (8oz) cream cheese, at room temperature
3 to 3 1/2 cups powdered sugar
1 tsp lemon extract
2-3 drops of lemon essential oil (such as this fabulous lemon EO)
3-4 tsp heavy whipping cream (or more, if you prefer a thinner consistency)
a few drops of yellow food coloring, if desired

Directions: In the bowl of your stand mixer, beat butter and cream cheese at medium/high speed until light and fluffly, about 3-4 minutes. Gradually add powdered sugar, covering your mixer with the shield attachment or a kitchen towel to avoid a cloud of powdered sugar all over your kitchen. :) Beat until well incorporated. Add lemon extract and essential oil and beat again for another minute or so. Finally, mix in whipping cream, one teaspoon at a time, until the frosting reaches your desired consistency. Frost your cupcakes and eat one (or more) right away! :) Trust me, I won't judge you. See the one cut in half in this picture? This was gone about two seconds after the photograph was taken... :))) Uh-hum....


Friday, April 18, 2014

Bulgarian Easter Bread, "Козунак" :)


This year, I decided to make the traditional Bulgarian Easter Bread known as "Козунак"/ kozunak. It is yeast bread which is a must on every Bulgarian table during this holiday. It is not very sweet but if made well, it is a real treat. And here lies one of the biggest challenges for almost every Bulgarian housewife: a successful homemade kozunak! :)  Most of us remember our grandmothers and then mothers waking up in the wee hours of the mornings to start their huge batches of kozunak and knead, and knead, and wait for it to rise, and knead some more, and wait some more- a true labor of love! While the recipe I used this year does not involve any kneading by hand (yeah for my shoulders!), it still requires a good dose of patience, as a good kozunak needs plenty of time to rise not once, but twice. In fact, my mother seems to think that her mother let her kozunak rise not twice but three times. Unfortunately, she is not with us any more and we have no written recipe for kozunak from her, so we cannot know for sure how she made it exactly. Luckily for me, I found a wonderful website by a fellow Bulgarian, now residing in the U.S. like me, who converted a recipe for kozunak to U.S. standards in more ways than one. The best part of the experience- using a bread maker for the kneading and first rising! I was beyond thrilled with this discovery! Many, many thanks to Tanita from http://tanitaang.blogspot.it! I will be forever grateful!

So, without further ado, here is the promised recipe for "Козунак", which I translated into English for all my English speaking friends who may want to try their luck with this delicious Easter bread!


Bulgarian Easter Bread, "Козунак"

Ingredients:
- 2 eggs and 1 egg white (save the egg yolk for glazing the bread), at room temperature
- about 1 cup milk, at room temperature (because the size of eggs varies, it is best to crack the eggs in a 2 cup measuring cup and then add enough milk to get a 1 1/2 cups liquid altogether; 1 cup= 240ml)
- 1 cup granulated sugar
- 1/4 cup melted unsalted butter (1/2 stick), cooled a little
- 1 tbsp rum (optional)
- the zest of 1 lemon
- the zest of 1 orange
- 4 1/4 cup bread flour, plus more for dusting later
- 1/2 tsp salt
- 1 tbsp dry yeast
- about 1/2 cup vegetable oil for adding during kneading, as well as more for oiling hands
- raisins (optional)
- slivered or whole blanched almonds (optional)

Note: For the success of this bread, it is very important that all ingredients are at room temperature!
 

Directions:
Set your bread maker on "dough" cycle (mine takes 1h30min: the first 30 minutes for kneading, the next 1 hour for rising).  In a little bowl, whisk together the 2 eggs and 1 egg white with the milk and the sugar until the sugar has dissolved. Pour the egg/milk/sugar mixture in the bread maker, then add the melted butter, the zests, and the flour on top. In the middle of the flour, make a little "well" and put the yeast. To one side in the flour, make another little well and put the salt. Start the kneading process on the bread maker. (I am so happy I don't have to do this by hand as my grandmother and mother used to do for years and years!!!)

During the kneading, after the dough starts forming into a ball and pulls away from the walls of the bread maker, add 2 tbsp of vegetable oil and dust with a little bit of flour right after that; repeat this 1 or 2 more times. Let the whole "dough" cycle finish. (Of course, if you do not have a bread maker you may do the kneading by hand, or with a stand mixer and then let the dough rise in a warm place; if you use your oven for that, make sure the temperature is no higher than 120F). Sweet dough rises more slowly, so if the dough hasn't doubled in size within the end of the cycle, let it sit longer. It should be at least doubled! The key to success with this bread is PATIENCE. :)

Once your dough has doubled in size, using your well-oiled hands, separate the dough into 2 or 3 parts. With this recipe, I was able to make three loaves: one round bread which I baked in a bundt pan, another one in a 9" round casserole dish and a third one in a standard bread loaf pan.

Every one of these parts, gets additionally divided into 3 or 4 pieces which you form into "ropes", oil really well and braid together into a loaf just like in the two photos below. Before forming the loaves, you can add raisins to your braids too (which you may want to soak in a little bit of rum first).


Place every braided loaf in a well greased and floured pan, cover and let rise in a warm place one more time. Again, if you are using your oven for that, make sure it is no more than 120 dgreees F. The dough should double or triple its size again (this may take a couple of hours, depending on the temperature in your house). Once ready to bake, set the oven to 365F. While waiting for the oven to warm up, glaze the loaves of bread with the egg yolk which you saved in the beginning and whisked with 1 tsp of milk. I used a kitchen brush for this. Sprinkle granulated sugar on top and then almonds, if using. Bake for 20-25 minutes, depending on the size of your loaves- if you made 3 loaves out of this dough, you should not need more than 20 minutes. If you only made it into 2 loaves, you may need 25 or even 30 minutes. Making smaller loaves is a better idea, though, as larger ones tend to brown too much on top before they can bake well on the inside.


 Once out of the oven, cool in the pan for a few minutes and then move to a wire rack. If you can resist it, wait for the bread to cool. Nobody in my family has that will power, so the loaf below was torn into just minutes after it was taken out of the oven... :)  What you are looking for in a successful "Козунак" is an interior that separates like "thread", sort of like in the pictures below...


Yes, it was one yummy "Козунак"! This is all that was left of it within 15 minutes. :)))


Happy Easter!

Wednesday, April 16, 2014

Arugula, Roasted Sweet Potatoes and Gorgonzola Salad with Red Wine Vinaigrette


This is hands down one of the salads that I can literally eat every. single. day. My family is a big fan of roasted sweet potatoes and roasted cauliflower, so these vegetables are prepared on a weekly basis in our house. :) Whenever I have them ready and roasted to go, I use some of the leftovers in this salad. It is quick, easy, amazingly yummy and very filling- my go to lunch. I drizzle it with a red wine vinaigrette I make myself, but you can certainly use any dressing of your choice.

Arugula, Roasted Sweet Potatoes and Gorgonzola Salad

Ingredients:
3 cups arugula
1/2 cup roasted sweet potatoes *
1/2 cup roasted cauliflower **
1/4 cup gorgonzola cheese (or feta if you are not a gorgonzola fan)
drizzle of red wine vinaigrette (see recipe below)

Directions:
Mix the first four ingredients in a salad bowl. Drizzle with the vinaigrette of your choice. Enjoy!

* The way I usually roast sweet potatoes is: I chop them in chunks, add some chopped onions, olive oil, salt and pepper to taste, and roast them for about 25-30 minutes at 425 degrees F, stirring occasionally.

** I roast cauliflower by separating the florets of 1 head, seasoning them with salt and pepper, and drizzling them with 1/4 olive oil which I have warmed up in the microwave for about 30-60 seconds with 1-2 cloves of minced garlic. This infuses the olive oil with the taste of garlic and makes the cauliflower really delicious as it roasts- at 425 degrees F for about 25-30, stirring a couple of times. I sometimes sprinkle it with a handful of parmesan or romano cheese a few minutes before I take it out of the oven. It is to die for! If you have never made cauliflower this way, you have to try it! You will never want to eat it any other way...


Red Wine Vinaigrette

Ingredients:
1/2 cup olive oil
1/4 cup red wine vinegar
1 clove crushed garlic
1/2 tsp Dijon mustard
1/2 tsp honey
1/2 tsp fresh dill or parsley
salt and freshly grounf black pepper to taste

Directions:
I usually put all the ingredients in my Kitchen Bullet and run it for a few seconds and Voila! :)
But you can also put everything in a mason jar and shake it until you get a homogenous mixture or just whisk the ingredients together in bowl. It is a delicious salad dressing that I make on an almost daily basis for everybody at home: so much better than store-bought ones!

Tuesday, April 15, 2014

Chocolate Nutella Frosting

I came up with this Chocolate Nutella Frosting because I was looking for the perfect accompaniment to the Chocolate Hazelnut Mocha Cupcakes I had made. The flavors work exceptionally well together, so this one is definitely a keeper! Luscious, velvety, decadent are just a few of the adjectives I would use to describe this frosting. You have to try it to believe it! :)
 
 
Chocolate Nutella Frosting
Ingredients:
1 stick (1/2 cup) unsalted butter, at room temperature
1 pkg (8oz) cream cheese, at room temperature
3 1/2 to 4 cups powdered sugar
1/3 cup Nutella (or other hazelnut spread)
3 tbsps cocoa powder (I used Hershey's Special Dark)
1 tsp pure vanilla extract

Directions:
In the bowl of your stand mixer, beat butter and cream cheese at medium/high speed until light and fluffly, about 3-4 minutes. Gradually add powdered sugar, covering your mixer with the shield attachment or a kitchen towel to avoid a cloud of powdered sugar all over your kitchen. :) Beat until well incorporated. Add Nutella and mix in. Add cocoa powder and vanilla extract and beat again for another minute or so. Frost your cake/cupcakes or grab a spoon and eat right of the bowl (don't worry, I am not going to tell anyone). :)


Note: The photos in this post show cupcakes frosted with the Chocolate Nutella Frosting and drizzled with Chocolate Ganache:

Chocolate Ganache:
Ingredients:
3oz dark chocolate, chopped
1/2 cup heavy whipping cream

Directions:
Bring the whipping cream to a boil in a little saucepan. Watch it carefully, because it may boil over. Put the chocolate in a heat-proof bowl. Pour the hot whipping cream over the chopped chocolate. Stir a little until the chocolate melts. Drizzle over cupcakes while before it sets.


If you want to make the Chocolate Hazelnut Mocha Cupcakes as well, here is the recipe for them:

Ingredients:
1 3/4 cups all-purpose flour
1 3/4 cups sugar
3/4 cup cocoa powder
2 tsps baking soda
1 tsp baking powder
1/2 tsp kosher salt
1 cup buttermilk, shaken (or 1 cup milk and 1tbsp white vinegar added and left 5 min)
1/2 cup vegetable oil
2 eggs, room temperature
1 tsp vanilla extract
1 cup hot hazelnut flavor coffee

Directions:
Preheat the oven to 350 degrees F. Line muffin tins with cupcake paper liners.

Sift the flour, sugar, cocoa, baking soda, baking powder, and salt into the bowl of an electric mixer fitted with a paddle attachment and mix on low speed until combined.

In another bowl or large measuring cup, combine the buttermilk, oil, eggs, and vanilla. Gently whisk.

With the mixer on low speed, slowly add the wet ingredients to the dry. With mixer still on low, add the coffee and stir just to combine – scrape up from the bottom to make sure all the flour is incorporated. The final batter will be very, very thin- do not be alarmed: that's how it is supposed to be. This thin batter is going to produce some super moist and delicious cupcakes- trust me on this one!

Pour the batter into the prepared muffin tins, filling them no more than 2/3 of the way and bake for 18-20 minutes, or until they test done. Cool in the pans for 2-3 minutes, then take out on wire racks to cool completely before frosting.

Makes about 2 dz cupcakes.


Thursday, April 10, 2014

Birds' Nest Cupcakes for Easter


Introducing today the Birds' Nest Cupcakes I made for my son's Easter party at school! Here they are below, all lined up and ready to take off for the party... :)


Vanilla Cupcakes with Chocolate Cream Cheese Frosting and Chocolate Cadburry Eggs in the "nests". Easy to make classic combination of flavors with an Easter "twist"- a special treat for first-graders... The vanilla cupcakes are moist and delicious- my favorite recipe by far. The Chocolate Cream Cheese Frosting is so decadent, it can be eaten all on its own (at least in yours' truly humble opinion)... :) But don't take my word for granted- make it and see for yourself!


Vanilla Cupcakes

Ingredients:
2 1/2 cups flour
1 teaspoon baking powder
1/2 teaspoon baking soda
1/2 teaspoon salt
3 large eggs
2 cups sugar
1 cup canola oil
2 teaspoons vanilla extract
1 cup sour cream
1/2 cup milk
 
Directions:
Preheat oven to 350F. Line muffin tins with paper liners (for cupcakes).
In a medium-sized bowl, whisk together flour, baking powder, baking soda and salt.
In the bowl of your electric mixer, beat eggs and sugar until thick and creamy (about 2 minutes).
Blend vanilla, oil, and sour cream.
Add flour and milk, alternating- starting and finishing with flour.
Pour in muffin tins, filling each about 2/3. Bake 18-19 minutes or until they test done.
Cool on wire racks before frosting.
 
Makes about 30 cupcakes.


Chocolate Cream Cheese Frosting

Ingredients:
1 cup (2 sticks) unsalted butter, at room temperature
4 oz (1/2 package) cream cheese, at room temperature
1-2 tsp pure vanilla extract
3 1/2 to 4 cups powdered sugar (about 1 pound)
1/4 cup cocoa powder (I used Hershey's Special Dark)
3-4 tsp heavy whipping cream or half-n-half

Directions:
In the bowl of your electric mixer, beat butter and cream cheese until light and fluffy, about 2-3 minutes. Add vanilla extract and mix to incorporate. Add powdered sugar cup by cup, making sure to cover the mixer with the shield attachement and/or kitchen towel to avoid a cloud of powdered sugar all over your kitchen once you turn the mixer back on. :) Beat until well incorporated. Add cocoa powder and mix well. Finally, mix in heavy cream (or half-n-half) until desired consistency is reached. Frost to your heart's content or grab a spoon and forget about the cupcakes... :)  It is that good!


Print recipe

Related Posts Plugin for WordPress, Blogger...